Page 6 of 19

toto tsma volume control cartridge manual pdf

The TOTO TSMA Volume Control Cartridge is a key component in modern plumbing systems, designed to regulate water flow with precision and durability. It features a ceramic disk design for smooth operation and long-lasting performance, making it an essential part of bathroom fixtures. This cartridge is known for its corrosion-resistant construction and ease of installation, ensuring reliable functionality in various applications. Its sleek design and advanced engineering make it a popular choice for both residential and commercial plumbing solutions.

1.1 Overview of the TOTO TSMA Volume Control Cartridge

The TOTO TSMA Volume Control Cartridge is a high-quality plumbing component designed to regulate water flow precisely. Made from corrosion-resistant bronze, it features a ceramic disk valve for smooth, durable performance. This cartridge is engineered to provide consistent water volume control, ensuring optimal functionality in bathroom fixtures. Its sleek design and advanced engineering make it a reliable choice for modern plumbing systems. The TSMA cartridge is compatible with various faucet configurations and is known for its long-lasting durability and ease of installation. It is a key element in maintaining efficient water flow and system performance.

1.2 Importance of the Volume Control Cartridge in Plumbing Systems

The volume control cartridge plays a pivotal role in plumbing systems by regulating water flow efficiently. It ensures precise control over the volume of water, preventing excessive usage and reducing waste. This component is crucial for maintaining system performance, as it protects fixtures from pressure fluctuations and debris. The cartridge’s durability and reliability make it essential for both residential and commercial plumbing, ensuring consistent water pressure and flow. Its presence contributes to the overall longevity of plumbing systems by minimizing wear and tear on connected fixtures and pipes. Regular maintenance of the cartridge is vital for optimal system functionality and water conservation.

Accessing the TOTO TSMA Volume Control Cartridge Manual

Accessing the TOTO TSMA Volume Control Cartridge manual is straightforward via online platforms like Build.com or TOTO’s official website. The manual is available as a free PDF download, providing detailed installation, maintenance, and troubleshooting guidelines for optimal use of the cartridge. It ensures users can easily understand and perform necessary adjustments or repairs, enhancing the overall performance and longevity of the plumbing system.

2.1 Where to Find the TOTO TSMA Volume Control Cartridge Manual PDF

The TOTO TSMA Volume Control Cartridge manual PDF can be found at several online sources, including Build.com and TOTO’s official website. These platforms offer free access to the manual, which includes detailed installation, maintenance, and troubleshooting guides. Additionally, online marketplaces like Amazon or Home Depot may provide links to download the PDF. For the most reliable and up-to-date information, it’s recommended to visit TOTO’s official support page or authorized distributors. These sources ensure authenticity and ease of access for users seeking the manual.

2.2 How to Download the TOTO TSMA Volume Control Cartridge Manual

Downloading the TOTO TSMA Volume Control Cartridge manual is straightforward. Visit TOTO’s official website or authorized retailers like Build.com, and navigate to the support or resources section. Use the search function to locate the TSMA cartridge manual. Select the appropriate PDF link and click to download. Ensure the source is official to avoid unauthorized versions. The manual typically includes installation instructions, technical specifications, and troubleshooting tips. Always verify the file’s authenticity before downloading to ensure compatibility and accuracy. This ensures you have reliable information for proper installation and maintenance of the cartridge.

2.3 Official Sources for the TOTO TSMA Volume Control Cartridge Manual

The TOTO TSMA Volume Control Cartridge manual can be found on TOTO’s official website or through authorized retailers like Build.com. These sources provide direct access to the PDF manual, ensuring authenticity and accuracy. Additionally, official distributors and plumbing supply websites often host the manual for easy download. Always verify the source to avoid unauthorized or outdated versions. The manual is typically available under the “Support” or “Resources” section, offering detailed installation, troubleshooting, and technical specifications.

Key Features of the TOTO TSMA Volume Control Cartridge

The TOTO TSMA cartridge features a ceramic disk design for smooth flow control, a corrosion-resistant bronze body, and easy installation. It ensures durability and optimal performance in plumbing systems;

3.1 Technical Specifications of the TOTO TSMA Volume Control Cartridge

The TOTO TSMA Volume Control Cartridge features a ceramic disk design for smooth operation and durability. It has a corrosion-resistant bronze body and a 1/2 NPT connection for compatibility with standard plumbing systems. The cartridge is designed to regulate water flow with precision, offering a temperature limit setting of less than 120°F. It weighs approximately 1 lb, making it lightweight yet robust. These specifications ensure reliable performance and ease of installation, aligning with TOTO’s commitment to quality and innovation in plumbing solutions.

3.2 Design and Construction of the TOTO TSMA Volume Control Cartridge

The TOTO TSMA Volume Control Cartridge is crafted with a ceramic disk design, ensuring smooth and durable operation. Its bronze body is corrosion-resistant, enhancing longevity and performance. The cartridge’s 1/2 NPT connection provides compatibility with standard plumbing systems, while its flow control mechanism allows for precise water regulation. Engineered for both functionality and aesthetics, the TSMA cartridge is designed to withstand the demands of daily use, offering a reliable and efficient solution for modern plumbing needs.

3.3 Benefits of Using the TOTO TSMA Volume Control Cartridge

Using the TOTO TSMA Volume Control Cartridge offers numerous advantages, including precise water flow regulation and enhanced durability. Its ceramic disk technology ensures smooth operation and minimizes wear and tear, reducing maintenance needs. The corrosion-resistant bronze body provides long-lasting reliability, while its easy installation saves time and effort. This cartridge also promotes water conservation by allowing users to adjust flow accurately; With its compatibility with standard plumbing systems and aesthetically pleasing design, the TSMA cartridge is a practical and efficient choice for modern bathrooms, enhancing both functionality and user experience.

Installation and Maintenance of the TOTO TSMA Volume Control Cartridge

Installation requires basic tools and adherence to manual guidelines. Regular maintenance involves cleaning and inspecting for wear. Replace worn parts promptly to ensure optimal performance.

4.1 Step-by-Step Installation Guide for the TOTO TSMA Volume Control Cartridge

Step 1: Turn off the water supply to the system before starting the installation.

Step 2: Disassemble the existing valve to access the old cartridge.
Step 3: Remove the old cartridge and clean the valve body thoroughly.
Step 4: Align the new TSMA cartridge with the valve body and insert it gently.
Step 5: Secure the cartridge according to the torque specifications provided in the manual.

Step 6: Reassemble the valve and restore water supply.

Step 7: Test the cartridge by adjusting the volume control to ensure proper function.
Follow these steps carefully to ensure a successful installation and optimal performance of the TOTO TSMA Volume Control Cartridge.

4.2 Common Mistakes to Avoid During Installation

When installing the TOTO TSMA Volume Control Cartridge, avoid common errors such as not turning off the water supply beforehand, which can lead to water damage. Ensure proper torque specifications are followed to prevent cartridge damage. Misaligning the cartridge with the valve body can result in poor performance or leaks. Additionally, overtightening the cartridge may cause irreparable harm. Failing to test the cartridge after installation can lead to undetected issues. Always refer to the manual for precise instructions to avoid these mistakes and ensure a smooth, leak-free operation. Proper installation is key to the cartridge’s longevity and functionality.

4.3 Maintenance Tips for the TOTO TSMA Volume Control Cartridge

Regular maintenance is essential to ensure the longevity and optimal performance of the TOTO TSMA Volume Control Cartridge. Clean the cartridge periodically by removing debris or mineral buildup that may affect water flow. Avoid using harsh chemicals or abrasive materials, as they can damage the ceramic disk. Check the temperature limit setting and adjust if necessary to prevent scalding. Inspect the O-rings and gaskets for wear and replace them as needed. Ensure proper water pressure is maintained to avoid strain on the cartridge. By following these tips, you can extend the lifespan of the cartridge and maintain its efficiency.

Troubleshooting the TOTO TSMA Volume Control Cartridge

Identify common issues like leaks or reduced water flow. Inspect for debris or mineral buildup and clean the cartridge. Check for proper installation and alignment. If issues persist, consider replacing worn-out parts or consulting a professional for assistance. Regular maintenance and proper handling can prevent most problems. Always refer to the manual for detailed troubleshooting steps and solutions to ensure optimal performance and longevity of the cartridge.

5.1 Common Issues with the TOTO TSMA Volume Control Cartridge

Common issues with the TOTO TSMA Volume Control Cartridge include leaks, reduced water flow, and mineral buildup. Leaks often occur due to worn-out seals or improper installation. Reduced water flow may result from debris or sediment accumulation within the cartridge. Mineral buildup, particularly in hard water areas, can also affect performance. Additionally, improper alignment or torque during installation can lead to malfunction. Regular maintenance, such as cleaning the cartridge and checking for worn parts, can help prevent these issues. Addressing these problems promptly ensures optimal performance and extends the cartridge’s lifespan.

5.2 How to Fix Leaks in the TOTO TSMA Volume Control Cartridge

To fix leaks in the TOTO TSMA Volume Control Cartridge, start by turning off the water supply and disassembling the valve. Inspect the O-rings and gaskets for signs of wear or damage. Replace any damaged seals with genuine TOTO parts. Ensure all connections are clean and free of debris before reassembling. Apply a small amount of Teflon tape to threaded connections for a tighter seal. If the leak persists, check the cartridge for proper alignment and torque according to the manual. Reinstall the cartridge and test the water flow to confirm the issue is resolved.

5.3 Adjusting the Volume Control Cartridge for Optimal Performance

To optimize the TOTO TSMA Volume Control Cartridge, start by turning off the water supply and disassembling the valve to access the cartridge. Locate the adjustment mechanism, typically a small screw or clip, and adjust it to regulate water flow. Ensure the temperature limit stop is set correctly to balance hot and cold water flow. Reassemble the valve and test the performance by checking for consistent flow and temperature control. If issues persist, consult the manual for specific torque settings or alignment instructions to ensure proper function. Regular adjustments can enhance performance and longevity of the cartridge.

The TOTO TSMA manual provides a comprehensive guide for installation, maintenance, and troubleshooting. For additional support, visit TOTO’s official website or authorized retailers like Build.com.

6.1 Summary of the TOTO TSMA Volume Control Cartridge Manual

The TOTO TSMA Volume Control Cartridge manual provides detailed guidance on installation, maintenance, and troubleshooting. It emphasizes proper handling and alignment during installation to ensure optimal performance. Regular cleaning and inspection are recommended to prevent debris buildup and maintain water flow efficiency; The manual also includes troubleshooting tips for common issues like leaks or reduced flow, advising users to check for worn-out parts or incorrect cartridge installation. By following the manual’s instructions, users can extend the cartridge’s lifespan and ensure reliable operation. TOTO’s commitment to quality and functionality is evident throughout the guide.

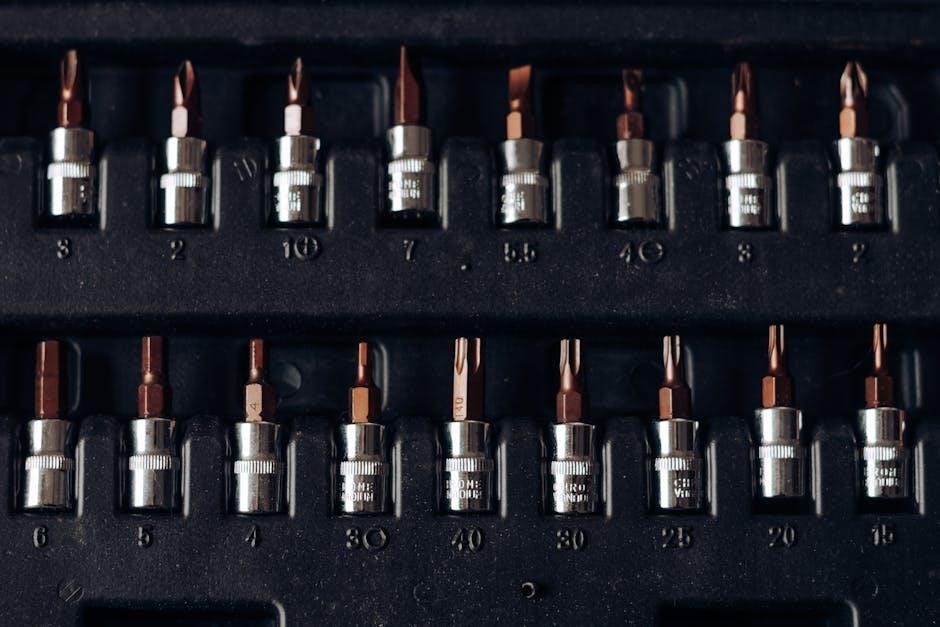
6.2 Recommended Tools for Working with the TOTO TSMA Volume Control Cartridge

To work effectively with the TOTO TSMA Volume Control Cartridge, several tools are recommended. An adjustable wrench or channel-type pliers are ideal for removing the cartridge from the valve body. A screwdriver may be needed for adjusting or securing components. Teflon tape can prevent leaks during reinstallation. A bucket or container is useful for water drainage. Additionally, a torque wrench ensures proper tightening to factory specifications. These tools help ensure a smooth and efficient process when installing, maintaining, or troubleshooting the cartridge. Having them on hand can prevent delays and ensure optimal performance.

6.3 Where to Find Additional Support and Resources

For additional support and resources regarding the TOTO TSMA Volume Control Cartridge, visit the official TOTO website or authorized retailers like Build.com. These platforms offer detailed product specifications, installation guides, and troubleshooting tips. Customer support teams are also available to address specific inquiries. Moreover, online forums and plumbing communities provide valuable insights and user experiences. Ensuring access to genuine TOTO parts and official documentation is crucial for maintaining optimal performance. These resources collectively enhance the installation, maintenance, and troubleshooting processes, ensuring a seamless experience with the TOTO TSMA Volume Control Cartridge.

mirro 22 quart pressure canner manual

Welcome to the Mirro 22 Quart Pressure Canner Manual, your comprehensive guide for safe and effective canning. Designed for both new and experienced users, this manual provides detailed instructions on operating your pressure canner, understanding its key features like selective pressure control, and utilizing its 22-quart capacity efficiently. Discover how to ensure safe usage and explore tested recipes for delicious home canning;

1.1 Importance of the Manual for Safe and Effective Use

The Mirro 22 Quart Pressure Canner Manual is essential for ensuring safe and effective use of your appliance. It provides critical safety guidelines, operating instructions, and troubleshooting tips to prevent accidents and maintain optimal performance. By following the manual, you can avoid common hazards, understand pressure control, and preserve food safely. Regular reference to this guide helps you maximize efficiency while adhering to best practices for canning and cooking. Proper usage ensures longevity and reliability of your pressure canner.

1.2 Overview of the Mirro 22 Quart Pressure Canner

The Mirro 22 Quart Pressure Canner is a durable, aluminum alloy appliance designed for safe and efficient canning and cooking. It features a locking lid, selective pressure control, and a large 22-quart capacity, allowing for processing up to seven quart jars. This versatile canner is ideal for home canning, meal prep, and cooking a variety of dishes. Its robust design ensures even heat distribution and consistent pressure, making it a reliable choice for both beginners and experienced users. Accompanied by a detailed manual and recipe book, it offers endless possibilities for creative and nutritious meal preparation.

Key Features and Benefits of the Mirro 22 Quart Pressure Canner

The Mirro 22 Quart Pressure Canner offers selective pressure control, a 22-quart capacity, and durable aluminum construction. Its versatility allows for efficient canning and cooking, ensuring safety and consistent results.

2.1 Design and Build Quality

The Mirro 22 Quart Pressure Canner is constructed from durable, heat-resistant aluminum, ensuring even heat distribution and long-lasting performance. Its sturdy design includes a secure locking lid and a robust pressure release valve, essential for safe operation. The ergonomic handle provides comfortable handling, while the overall build is designed to withstand the rigors of frequent use. This high-quality construction makes it a reliable choice for home canning and pressure cooking.

2.2 Capacity and Versatility for Canning and Cooking

The Mirro 22 Quart Pressure Canner offers ample space for canning and cooking, accommodating up to seven quart jars. Its large capacity makes it ideal for preparing bulk meals and preserving food. Beyond canning, it excels in cooking a variety of dishes, from hearty stews to tender roasts, due to its ability to distribute heat evenly. This versatility allows users to maximize their culinary creativity while ensuring efficient processing for both small and large batch needs.

Understanding the Parts of the Mirro 22 Quart Pressure Canner

The Mirro 22 Quart Pressure Canner consists of a durable body, locking lid, pressure release valve, and jar rack, each designed for safe and efficient canning operations.

3.1 Main Components of the Canner

The Mirro 22 Quart Pressure Canner features essential components designed for safe and efficient operation. The durable, heat-resistant body houses the cooking chamber, while the locking lid ensures a secure seal during canning. The pressure release valve regulates steam and pressure, and the jar rack holds jars in place. Additionally, the selective pressure control allows for precise pressure adjustments, and the gasket ensures a tight seal. These components work together to facilitate safe and effective pressure canning processes.

3.2 Function of Each Part in the Canning Process

The locking lid creates a secure seal to maintain pressure, while the pressure release valve regulates steam and ensures safe pressure levels. The selective pressure control allows users to set precise pressure settings, optimizing cooking conditions. The jar rack prevents jars from touching the bottom, promoting even heating, and the gasket ensures a tight seal to avoid leaks. The vent pipe facilitates steam release, while the regulator maintains consistent pressure. Each part works together to ensure safe, efficient, and successful canning outcomes.

Safety Guidelines for Using the Mirro 22 Quart Pressure Canner

Always read the manual before use. Inspect all parts for damage. Avoid using on glass or ceramic stovetops. Never leave the canner unattended during operation.

4.1 Pre-Use Safety Checks

Before each use, inspect the lid, gasket, and pressure valve for damage or wear. Ensure all parts are clean and properly aligned. Check the stove compatibility, as the canner cannot be used on glass or ceramic surfaces. Verify that the selective pressure control is functioning correctly. Always ensure the area around the canner is clear of flammable materials. Familiarize yourself with the emergency release procedure. These pre-use checks are crucial for safe and effective operation of the Mirro 22 Quart Pressure Canner.

4.2 Safety Precautions During Operation

Never leave the Mirro 22 Quart Pressure Canner unattended during operation. Keep children and pets away from the cooking area. Avoid placing the canner on glass or ceramic stovetops, as they may not withstand the heat. Always ensure the lid is securely locked before increasing heat. Never open the lid until pressure has been fully released. Keep a safe distance from the pressure release valve to avoid steam burns. Regularly monitor the gauge to maintain the correct pressure level. Always use oven mitts when handling hot components.

Step-by-Step Instructions for Using the Mirro 22 Quart Pressure Canner

Start by assembling the canner, adding water, and placing jars on the rack. Secure the lid, monitor pressure, and process according to recipe guidelines. Allow cooling naturally before opening.

5.1 Preparing the Canner for First Use

Before first use, unpack and wash all parts in warm, soapy water. Rinse thoroughly and dry. Inspect the gasket, lid, and vent for any damage or debris. Ensure all components are in good condition. Place the canner on a heat-resistant surface, adding 2-3 inches of hot water. Insert the rack and jars, ensuring proper alignment. Follow manual guidelines for initial setup and safety checks to guarantee optimal performance and safety during your first canning session.

5.2 Loading and Processing Jars

Start by ensuring jars and lids are clean and sterilized in boiling water. Place the jar rack in the canner and add 2-3 inches of hot water. Carefully load prepared jars into the rack, leaving space between them. Secure the lid, aligning handles and tightening knobs. Set the pressure regulator to the recommended PSI. Bring to a boil on high heat until pressure is reached, then reduce heat to maintain it. Process for the recommended time, then let pressure drop naturally. Remove jars with a lifter and let them cool. Check seals after 24 hours and store properly.

Pressure Control and Monitoring

The Mirro 22 Quart Pressure Canner features a selective pressure control, allowing users to monitor and regulate pressure effectively during canning, ensuring safe and consistent results.

6;1 Understanding the Selective Pressure Control

The Selective Pressure Control on the Mirro 22 Quart Pressure Canner allows precise regulation of internal pressure, offering three distinct settings: 5, 10, and 15 PSI. This feature ensures optimal cooking control for various tasks, from delicate vegetables to hearty meats. The control mechanism maintains steady pressure, preventing fluctuations that could affect canning quality. Easy to operate, it enhances safety and efficiency, making it ideal for both new and experienced users. Proper use of this feature is essential for achieving consistent results in pressure canning and cooking.

6.2 Monitoring Pressure During Cooking

Monitoring pressure during cooking is critical for safe and effective canning with the Mirro 22 Quart Pressure Canner. The regulator valve ensures steady pressure, emitting a gentle rocking sound when active. Always watch the pressure gauge to maintain the desired PSI, typically 10-15 PSI for canning. Never leave the canner unattended, as pressure fluctuations can lead to unsafe conditions. Adjust the heat source as needed to maintain consistent pressure, ensuring proper sterilization and food safety. Regular checks prevent over-pressurization and potential hazards.

Maintenance and Cleaning of the Mirro 22 Quart Pressure Canner

Regularly clean the Mirro 22 Quart Pressure Canner by washing all parts with mild soap and warm water. Dry thoroughly before storing to prevent rust. Routine maintenance ensures optimal performance and longevity.

7.1 Routine Cleaning After Each Use

After each use, rinse the Mirro 22 Quart Pressure Canner with warm water to remove food residue. Wash all components, including the lid, gasket, and racks, with mild soap and a soft sponge. Avoid abrasive cleaners to prevent scratching. Dry thoroughly with a clean towel, paying extra attention to the gasket and valve areas to prevent moisture buildup. Regular cleaning ensures optimal performance and maintains the longevity of your pressure canner.

7.2 Long-Term Storage and Maintenance Tips

For long-term storage, ensure the Mirro 22 Quart Pressure Canner is completely dry to prevent rust or mold. Store it in a cool, dry place away from direct sunlight. Check the gasket and seals regularly for wear and tear, replacing them as needed. Lubricate moving parts lightly with food-safe oil to maintain smooth operation. Refer to the manual for specific maintenance recommendations to ensure your pressure canner remains in optimal condition for years of reliable service.

Troubleshooting Common Issues

Address common issues like steam leaks or pressure regulator malfunctions by inspecting gaskets and ensuring proper lid alignment. If the pressure gauge fails, refer to the manual for recalibration. For persistent problems, contact Mirro customer support or consult the troubleshooting guide in your manual for detailed solutions and maintenance tips to restore optimal performance.

8.1 Addressing Leaks and Pressure Issues

If steam leaks from the lid, inspect the gasket for damage or misalignment. Ensure the lid is properly locked and aligned. For pressure issues, check the regulator and gauge calibration. If the pressure gauge malfunctions, refer to the manual for recalibration steps. Clean the vent pipe and pressure regulator regularly to prevent blockages. If leaks persist, replace worn gaskets or seals. Always follow the manual’s troubleshooting guide for detailed solutions to restore proper function and safety.

8.2 Resolving Other Common Problems

For issues like the canner not building pressure, check the seal alignment and ensure the lid is properly locked. If excessive noise occurs, verify water levels are correct. Stuck lids can be resolved by allowing the canner to cool completely before gently prying it open. If the pressure gauge is faulty, recalibrate it as instructed. Always refer to the manual for specific troubleshooting steps to address these issues effectively and ensure safe operation.

Recipes and Cooking Ideas

Explore delicious recipes like Vegetable Soup and Beef Vegetable Dinner, perfect for the Mirro 22 Quart Pressure Canner. Ideal for meal prep and large batches effortlessly.

9.1 Suggested Recipes for Pressure Canning

Discover the versatility of your Mirro 22 Quart Pressure Canner with these tested recipes. Try making a hearty Vegetable Soup or a flavorful Beef Vegetable Dinner, perfect for meal prep. The canner’s large capacity allows you to cook in bulk, ensuring fresh, nutritious meals year-round. Follow the manual’s guidelines for scaling recipes to fit your needs, and explore additional ideas for canning fruits, meats, and vegetables. These recipes highlight the efficiency and flavor retention of pressure canning.

9.2 Meal Prep Ideas Using the Pressure Canner

Maximize your meal prep with the Mirro 22 Quart Pressure Canner. Prepare large batches of chili, stews, and soups in advance, ensuring healthy, ready-to-eat meals. Use the canner to cook grains, proteins, and vegetables efficiently, then portion them for the week. The pressure canner’s capacity allows for bulk cooking, making meal prep faster and more convenient. Explore the manual’s recipe section for inspiration and tips on preserving your prepped meals for long-term enjoyment.

Warranty and Customer Support

The Mirro 22 Quart Pressure Canner is backed by a 10-Year Limited Warranty, ensuring durability and customer satisfaction. For inquiries or assistance, contact Mirro’s customer service at 1-800-850-2501 or via email for reliable support and troubleshooting.

10.1 Warranty Details and Coverage

The Mirro 22 Quart Pressure Canner is protected by a 10-Year Limited Warranty, covering defects in materials and workmanship under normal use. This warranty ensures repair or replacement of faulty components, excluding damage caused by misuse, neglect, or wear and tear. For warranty claims, contact Mirro’s customer service at 1-800-850-2501 or via email. This coverage underscores Mirro’s commitment to durability and customer satisfaction, providing peace of mind for your investment in the pressure canner.

10.2 Contact Information for Customer Service

For assistance with your Mirro 22 Quart Pressure Canner, contact customer service at 1-800-850-2501 (toll-free) or 305-640-3000. Fax inquiries can be sent to 305-640-4555. Email support is available at customerserviceimusagroupeseb.com. Mirro’s dedicated team is ready to address questions, provide troubleshooting help, or assist with warranty claims. Reach out for reliable support to ensure optimal performance and longevity of your pressure canner.

positive covid test results template pdf labcorp

Overview of the Positive COVID Test Results Template

The Positive COVID Test Results Template is a fillable PDF designed by Labcorp to document and share COVID-19 test results securely. It includes patient details, test specifics, symptoms, and exposure history, ensuring accurate and organized reporting while maintaining compliance with health guidelines.

1.1 Importance of Documenting Test Results

Documenting test results is crucial for contact tracing, workplace safety, and legal compliance. It ensures accurate records for monitoring and reporting, supporting public health efforts and clear communication of patient status.

1.2 Purpose of the Labcorp Template

The Labcorp template streamlines COVID-19 test result documentation, ensuring clarity and efficiency in reporting. It standardizes the process for healthcare providers, employers, and individuals to manage positive test cases effectively. The template supports contact tracing, workplace safety, and legal compliance while maintaining patient privacy and secure sharing of test results.

Structure of the Positive COVID Test Results Template

The template includes sections for patient details, test specifics, symptoms, and exposure history, ensuring organized and clear documentation of COVID-19 test results for healthcare and safety purposes.

2.1 Patient Information Section

The Patient Information Section includes fields for the patient’s full name, date of birth, and contact details. This section ensures accurate identification and communication, aiding in contact tracing and follow-up care. It also helps healthcare providers maintain organized records and facilitate timely notifications. The information collected here is essential for verifying test results and ensuring patient safety and confidentiality.

2.2 Test Details and Results

The Test Details and Results section includes the type of COVID-19 test administered, the date of the test, and the specific result, such as “positive” or “negative.” It also provides interpretation of the results, indicating whether SARS-CoV-2 was detected. This section is crucial for confirming infection status and guiding further medical actions, ensuring clear and precise documentation of test outcomes for healthcare providers and patients alike.

2.3 Symptom and Contact Information

This section captures the patient’s symptoms, their onset date, and a list of close contacts. It aids in understanding the spread and managing public health responses. Symptoms documented include fever, cough, and shortness of breath, while contact information helps trace potential exposures, ensuring effective case management and reducing further transmission risks.

How to Access the Labcorp COVID Test Results Template

The Labcorp COVID Test Results Template can be accessed through the Labcorp Patient account or obtained from healthcare providers who ordered the test.

3.1 Through Labcorp Patient Account

Accessing the Labcorp COVID Test Results Template is straightforward via the Labcorp Patient account. Patients can log in to their account, navigate to the COVID-19 test results section, and download the template directly. The platform ensures secure access to personal test results and provides a user-friendly interface for viewing and printing the necessary documentation.

3.2 Via Healthcare Providers

Healthcare providers who ordered COVID-19 tests through Labcorp can provide patients with access to the Positive COVID Test Results Template. Patients can receive their test results and the template directly from their healthcare provider, ensuring seamless access to necessary documentation for workplace notifications, contact tracing, or medical leave. This method offers convenience and accuracy for patients who prefer to obtain their records through their healthcare provider.

Steps to Fill Out the Template

The template requires entering personal details, test information, and symptoms. Ensure accuracy and compliance with health guidelines when completing each section for proper documentation and reporting.

4.1 Entering Personal and Test Information

The initial step involves accurately entering the patient’s personal details and test specifics. This includes the patient’s full name, date of birth, and contact information, as well as the test date and whether the result is positive or negative. Ensuring the accuracy of this information is crucial for maintaining reliable documentation, essential for healthcare providers and contact tracing efforts.

4.2 Completing Symptoms and Exposure Details

After entering personal and test information, the next step is to document symptoms and exposure details. This includes noting any symptoms the patient is experiencing, such as fever, cough, or shortness of breath. Additionally, the template may ask for details about recent contacts or potential exposure sources. Accurate completion of this section is vital for contact tracing and public health efforts.

Use Cases for the Positive COVID Test Results Template

The template aids in workplace safety, contact tracing, and record-keeping for healthcare providers, ensuring efficient documentation and sharing of positive COVID-19 test results securely.

5.1 Workplace Safety and Contact Tracing

The template plays a crucial role in workplace safety by documenting positive test results, enabling employers to identify close contacts and prevent further spread. It also aids in contact tracing efforts by providing detailed exposure history and symptom timelines, helping organizations maintain a safe environment while ensuring compliance with health guidelines. This streamlined process supports efficient communication and decision-making for workplace safety protocols.

5.2 Record-Keeping for Healthcare Providers

The Positive COVID Test Results Template serves as a vital tool for healthcare providers to maintain accurate and organized patient records. It includes detailed sections for patient information, test specifics, symptoms, and exposure history, ensuring consistent documentation. This standardized format aids in tracking patient cases, facilitating follow-up care, and maintaining compliance with medical record-keeping requirements, ultimately enhancing patient management and care coordination efforts.

Legal and Privacy Considerations

The template adheres to HIPAA guidelines, ensuring patient data privacy and secure sharing of test results to maintain confidentiality and legal compliance in healthcare settings.

6.1 Compliance with HIPAA Guidelines

The Labcorp template ensures HIPAA compliance by safeguarding patient health information (PHI) through secure data handling and encrypted sharing. It requires authorization for disclosure, protecting privacy and maintaining legal standards for healthcare data. The template’s design ensures all sensitive information is accessed and shared only by authorized personnel, upholding confidentiality and regulatory requirements.

6.2 Secure Sharing of Test Results

The Labcorp template enables secure sharing of test results through encrypted emails or portals, ensuring confidentiality. It supports password-protected PDFs and limited access to authorized personnel only. Users can share results via email, fax, or Labcorp’s online portal, maintaining data security and compliance with privacy standards. This ensures sensitive information remains protected during transmission and storage.

Submitting the Completed Template

The completed template can be submitted electronically via email or through Labcorp’s secure online portal. It can also be printed and faxed for added convenience, ensuring timely processing.

7.1 Electronic Submission via Email or Portal

Completed templates can be submitted electronically through Labcorp’s secure online portal or via email. This method ensures quick delivery and reduces processing delays. The PDF template is fillable and can be saved directly from your device. Once submitted, recipients receive instant confirmation, maintaining efficiency and security. This digital process aligns with HIPAA guidelines, safeguarding patient data and streamlining communication.

7.2 Printing and Faxing Options

The completed template can be printed for physical submission or faxed to designated healthcare providers. Printing ensures a hard copy for personal or institutional records, while faxing offers an alternative to electronic submission. Both methods maintain the integrity and security of the document, adhering to Labcorp’s protocols for handling sensitive medical information. This option is ideal for individuals without digital access or preferring traditional methods.

Common Questions About the Template

Users often ask if the template can be edited online or downloaded for free. It is available at no cost and can be filled out digitally or printed for submission.

8.1 Can the Template Be Edited Online?

The Positive COVID Test Results Template can be edited online using platforms like pdfFiller. It offers fillable fields for patient details, test results, and symptoms, allowing digital signatures and secure sharing via email or fax. This feature ensures convenience while maintaining the integrity and accuracy of the documentation, adhering to health guidelines and privacy standards.

8.2 Is the Template Available for Free?

The Positive COVID Test Results Template is available for free through Labcorp’s patient portal or via healthcare providers. Patients can access and download the template at no cost, as it is part of Labcorp’s services for COVID-19 testing. However, some third-party platforms offering editing tools may charge for advanced features, but the template itself remains free to obtain and use.

Troubleshooting Tips

Common issues include PDF fillability problems or submission errors. Ensure Adobe Acrobat is updated, check form fields for accuracy, and verify internet connectivity before submitting the template.

9.1 Issues with PDF Fillability

Common issues with the Labcorp Positive COVID Test Results Template include PDF fillability problems. Ensure Adobe Acrobat is updated, as outdated versions may not support fillable fields. Use a compatible browser or download the PDF to edit. Enable JavaScript if prompted, as it’s required for form functionality. Clear browser cache and ensure a stable internet connection to avoid errors during completion.

9.2 Problems with Template Submission

Common issues with submitting the Labcorp Positive COVID Test Results Template include incomplete fields or format errors. Ensure all required sections are filled accurately. Check for file size limits when uploading or emailing. Verify the PDF is saved correctly before submission. If issues persist, contact Labcorp support or consult the troubleshooting guide for assistance with resolving submission-related problems effectively.

The Role of Labcorp in COVID Testing

Labcorp has processed over 15 million COVID-19 tests, playing a crucial role in diagnosing and managing the pandemic. Their advanced robotic systems, like Propel, enhance efficiency in handling high test volumes, ensuring timely and accurate results for patients nationwide, significantly contributing to public health efforts during the COVID-19 crisis.

10.1 Volume of Tests Processed

Labcorp has processed over 15 million COVID-19 tests, demonstrating its significant role in addressing the pandemic. This high volume underscores Labcorp’s capacity to support widespread testing, enabling timely diagnosis and management of COVID-19 cases across the U.S. Their robust infrastructure and advanced robotic systems, such as Propel, have been instrumental in handling large-scale testing demands efficiently.

10.2 Technological Innovations in Testing

Labcorp has implemented advanced robotic systems, such as Propel, to process up to 8,000 test tubes per hour, enhancing efficiency. Their COVID-19 RT-PCR tests utilize cutting-edge molecular diagnostics to detect SARS-CoV-2 accurately. These technological innovations, combined with digital integration for result reporting, have streamlined testing processes, ensuring faster turnaround times and improved accuracy in delivering critical health information.

Benefits of Using the Labcorp Template

The Labcorp template streamlines COVID-19 reporting, ensuring accurate documentation and secure sharing of results. It aids in contact tracing, workplace safety, and maintains compliance with health guidelines efficiently.

11.1 Streamlined Reporting Process

The Labcorp template simplifies the reporting process by providing pre-filled fields and organized sections, reducing administrative tasks. Its fillable PDF format allows quick data entry, minimizing errors and saving time. Electronic submission options further enhance efficiency, ensuring timely sharing of results with healthcare providers and employers. This streamlined approach reduces delays and improves overall documentation accuracy, making it a user-friendly solution for COVID-19 test result reporting.

11.2 Improved Accuracy of Documentation

The Labcorp template enhances documentation accuracy by providing standardized fields for patient details, test results, and symptom tracking. Mandatory fields and clear sections minimize errors, ensuring all necessary information is captured. The format reduces discrepancies, while predefined options for test outcomes and symptoms further improve precision. This structured approach ensures consistent and reliable data entry, maintaining high standards of accuracy in COVID-19 test result documentation.

Future of COVID Test Result Documentation

The future of COVID test result documentation lies in integration with digital health platforms and AI-driven analysis, enhancing efficiency and accuracy for healthcare providers and patients.

12.1 Integration with Digital Health Platforms

Integrating the Positive COVID Test Results Template with digital health platforms will streamline reporting, enhance data accessibility, and improve real-time monitoring. This integration allows seamless sharing of test results with healthcare providers, public health systems, and patients through secure portals. It also supports automated data entry, reducing errors and enabling faster response to outbreaks. Such advancements ensure efficient tracking and management of COVID-19 cases, promoting better public health outcomes.

12.2 Potential for AI-Driven Analysis

The integration of AI-driven analysis with COVID test result templates could revolutionize data interpretation. AI can identify patterns, predict trends, and enhance decision-making by analyzing large datasets from test results. This technology could aid in early detection of outbreaks and optimize resource allocation. Labcorp’s advancements in testing volume and innovation make AI integration a promising tool for improving public health responses and personalized care strategies.

g14 bus schedule pdf

G14 Bus Schedule PDF Overview

The G14 bus schedule PDF provides a comprehensive overview of the route, including operating hours, key stops, and a detailed route map for efficient trip planning.

The G14 bus route operates between New Carrollton and Greenbelt, serving key areas like Good Luck Road and Greenbelt Road. It is a vital transportation link for residents and commuters, connecting residential neighborhoods with commercial hubs and metro stations efficiently.

1.2 Importance of the G14 Bus Schedule PDF

The G14 bus schedule PDF is essential for planning trips, offering detailed timetables, route maps, and service alerts. It helps passengers navigate efficiently, ensuring timely arrivals and departures while providing clarity on operational hours and key stops along the route.

1.3 Recent Updates to the G14 Bus Schedule

Recent updates to the G14 bus schedule include revised timetables, minor service adjustments, and the addition of new stops to enhance connectivity. These changes aim to improve service reliability and passenger convenience, ensuring the schedule remains accurate and user-friendly for daily commuters.

G14 Bus Route Overview

The G14 bus route connects Greenbelt and New Carrollton, covering key areas in Prince George’s County. It spans approximately 13.8 miles, serving as a vital link for residents and commuters.

2.1 Start and End Points of the G14 Bus Route

The G14 bus route begins at New Carrollton Station Bus Bay T3 and ends at Greenbelt Station Bus Bay F, providing essential transit services in Prince George’s County, Maryland, for daily commuters and residents.

2.2 Key Stops Along the G14 Bus Route

The G14 bus route includes key stops such as Harkins Road, Annapolis Road, Beltway Plaza, and Greenbelt Metro Drive, offering convenient access to residential neighborhoods, shopping centers, and transfer points, ensuring efficient travel for commuters and residents between New Carrollton and Greenbelt.

2.3 Total Distance and Travel Time

The G14 bus route spans approximately 13.8 miles, with travel times ranging from 45 to 60 minutes, depending on traffic and the number of stops. This duration allows passengers to plan their journeys efficiently, whether commuting to work or traveling across the service area.

G14 Bus Schedule Details

Explore the G14 bus schedule, including weekday operating hours, peak and off-peak frequencies, and special weekend or holiday schedules, ensuring timely and convenient travel for all passengers.

3.1 Operating Hours for Weekdays

The G14 bus operates weekdays, with eastbound service running from 5:15 AM to 10:15 PM and westbound service from 5:00 AM to 11:20 PM. This schedule ensures consistent availability for commuters during peak and off-peak hours, providing reliable transportation throughout the day.

3.2 Frequency of Buses During Peak and Off-Peak Hours

During peak hours, G14 buses run every 15-20 minutes, ensuring quick service for busy commuters. Off-peak hours see buses every 30-40 minutes, maintaining reliable coverage without overcrowding, thus optimizing service efficiency throughout the day.

3.3 Special Schedules for Weekends and Holidays

On weekends and holidays, G14 buses operate on a reduced schedule, with frequencies of 30-45 minutes. Major holidays may see further adjustments, with fewer trips to accommodate lower demand. Always check the official G14 bus schedule PDF for exact timings and plan your trip accordingly.

How to Download the G14 Bus Schedule PDF

The G14 bus schedule PDF is available on WMATA’s official website and the Moovit app. Download it easily for convenient and reliable trip planning.

4.1 Official Sources for the G14 Bus Schedule PDF

The G14 bus schedule PDF can be downloaded from WMATA’s official website and the Moovit app. These sources provide the most accurate and up-to-date information for efficient trip planning and real-time updates on the G14 route.

4.2 Steps to Download the PDF from Moovit App

Open the Moovit app, search for the G14 bus route, and select “View Schedule.” Navigate to the “Download PDF” option, then save the file for offline access. This user-friendly process ensures you have the latest G14 bus schedule for convenient trip planning.

4.3 Tips for Viewing and Printing the PDF

For optimal viewing, adjust the zoom level in your PDF reader. Print the schedule on standard-sized paper and ensure landscape orientation for better readability. Verify page scaling settings before printing to maintain clarity. Always check for the latest version of the PDF for updated information.

Real-Time Tracking of the G14 Bus

Real-time tracking for the G14 bus is available via apps like Transit and Moovit, offering live updates, bus locations, and trip planning features to monitor delays or route changes.

5.1 Using the Transit App for Live Updates

The Transit App offers real-time tracking for the G14 bus, providing live updates on bus locations, arrival times, and service alerts. Commuters can monitor delays, plan trips, and receive notifications for schedule changes, ensuring efficient travel on the G14 route.

5.2 How to Plan Your Trip with Real-Time Data

Use real-time data tools to monitor the G14 bus location, arrival times, and service alerts. Set up notifications for schedule changes or delays, allowing you to adjust your travel plans accordingly and ensure a smooth commute on the G14 route.

5.3 Bus Tracking Features on the Moovit Platform

Mooovit offers real-time tracking of the G14 bus, enabling users to view live locations, arrival times, and service alerts. The platform provides an interactive route map, allowing passengers to plan their journeys efficiently and receive updates on any schedule changes or disruptions.

G14 Bus Route Map

The G14 bus route map visually displays the journey from New Carrollton Station to Greenbelt, highlighting major stops and transfer points for easy navigation using Moovit.

6.1 Visual Representation of the Bus Route

The G14 bus route map offers a clear visual guide, showcasing the entire journey from New Carrollton Station to Greenbelt. It highlights major stops, transfer points, and key landmarks, ensuring passengers can navigate the route efficiently. The map is available for download as a PDF or viewed online through Moovit.

6.2 Key Landmarks and Transfer Points

The G14 bus route passes by notable landmarks such as New Carrollton Station and Greenbelt Station. Key transfer points include Harkins Road, Lanham Drive, and Annapolis Road intersections, allowing passengers to connect to other bus routes and metro lines seamlessly for extended travel options.

6.3 How to Read the Route Map Effectively

Use the color-coded route map to identify stops and transfer points. Locate your destination by following the numbered sequence of stops. Refer to the legend for symbols indicating transfers or landmarks. Zoom in for detailed views of complex intersections. Cross-check with the PDF schedule for accurate arrival times and trip planning.

G14 Bus Stops and Connections

The G14 route includes key stops like New Carrollton Station, Harkins Rd, Annapolis Rd, and Lanham Dr. It connects to Metro lines and other bus routes for seamless transfers.

7.1 List of Major Bus Stops on the G14 Route

The G14 route includes major stops such as New Carrollton Station, Harkins Rd, Annapolis Rd, and Lanham Dr; These stops provide convenient access to key locations and connections to other transit services, ensuring efficient travel across the region.

7.2 Connections to Other Bus Routes and Metro Lines

The G14 route connects seamlessly with other Metrobus routes like G12, C2, and R12, as well as the Washington Metro at New Carrollton Station. It also offers transfers to additional transit lines, enhancing accessibility and expanding travel options for passengers throughout the network.

7.3 Accessibility Features at Bus Stops

Bus stops on the G14 route are equipped with accessibility features, including ramps, Braille signage, and audio announcements. Priority seating areas are also available for passengers with disabilities, ensuring an inclusive and convenient travel experience for all riders.

G14 Bus Fare and Payment Options

The G14 bus fare is $2.00, payable via SmarTrip card, cash, or contactless payment. Discounts are available for seniors and disabled riders, with free transfers within 3 hours.

8.1 Current Fare Rates for the G14 Bus

The current fare for the G14 bus is $2.00, payable via SmarTrip card, cash, or contactless payment methods. Discounts are available for seniors and passengers with disabilities, with free transfers within 3 hours of initial payment.

8.2 Accepted Payment Methods

The G14 bus accepts SmarTrip cards, cash, and contactless payments like Apple Pay and Google Pay. Cash payments require exact change, as no change is given. Using a SmarTrip card offers transfer benefits and fare balance management.

8.3 Special Discounts and Passes

The G14 bus offers discounted fares for seniors, people with disabilities, and students with valid ID. Riders can use SmarTrip cards for convenient fare payment and transfers. A 7-Day Regional Bus Pass is also available for unlimited travel, providing cost-effective options for frequent commuters.

G14 Bus Customer Service

WMATA provides customer service support for G14 bus inquiries, including contact information, feedback options, and assistance for passengers with disabilities, ensuring accessible and reliable service.

9.1 Contact Information for WMATA Customer Service

For inquiries about the G14 bus route, contact WMATA Customer Service at 202-637-7000 or visit their website. Office hours are Monday-Friday, 8:00 AM to 6:00 PM. Email inquiries can be sent to customer.service@wmata.com for assistance with schedules, routes, or service-related concerns.

9.2 How to Provide Feedback on the G14 Bus Service

Passengers can provide feedback on the G14 bus service through WMATA’s website by filling out the online feedback form. Additionally, comments can be submitted via email to customer.service@wmata.com or by calling 202-637-7000. Feedback helps improve service quality and address passenger concerns effectively.

9.3 Assistance for Passengers with Disabilities

WMATA ensures accessibility for passengers with disabilities on the G14 bus route. All buses are equipped with wheelchair ramps and priority seating. Passengers can request assistance through WMATA’s customer service or by contacting 202-637-7000. Additionally, ADA-compliant features ensure safe and comfortable travel for all passengers with disabilities.

The G14 bus schedule PDF is an essential resource for planning trips, offering detailed route maps, timetables, and accessibility features. Download it via Moovit for seamless travel planning.

10.1 Summary of Key Information

The G14 bus schedule PDF offers a comprehensive guide to the route, including operating hours, key stops, and a detailed map. It is available for download via Moovit, ensuring easy access to real-time updates and trip planning features. This resource is essential for navigating the Greenbelt-New Carrollton Line efficiently.

10.2 Final Tips for Using the G14 Bus Schedule PDF

Download the PDF from Moovit for offline access and print it for convenience. Check for real-time updates before your trip and plan your route in advance. Use the map to identify key stops and transfer points, ensuring a smooth journey on the Greenbelt-New Carrollton Line.

grand princess deck plan pdf

Discover the Grand Princess cruise ship layout with the official deck plan PDF, featuring cabin locations, dining venues, entertainment options, and public areas for seamless cruise planning.

Overview of the Grand Princess Cruise Ship

The Grand Princess, launched in 1998, is a renowned cruise ship offering luxurious voyages. With a guest capacity of 2,600, it features 1,301 cabins across 16 decks. The ship underwent significant renovations in 2019, enhancing dining and entertainment options. Known for its Movies Under the Stars screen and The Sanctuary adult retreat, it provides a blend of relaxation and vibrant activities, ensuring unforgettable cruising experiences for all passengers.

Importance of Deck Plans for Cruise Planning

Deck plans are essential for planning a seamless cruise experience. They provide detailed layouts of all 16 decks, highlighting cabin locations, public venues, pools, spas, and entertainment options. Passengers can identify nearby amenities, plan activities, and make informed decisions about dining and entertainment. This helps maximize onboard comfort and ensures a well-organized, enjoyable journey aboard the Grand Princess.

Key Features of the Grand Princess Deck Plan

The Grand Princess deck plan highlights 16 passenger decks, featuring diverse amenities like pools, spas, dining venues, entertainment options, and various cabin categories for all preferences.

Deck Layout and Public Venues

The Grand Princess features a well-organized deck layout with 16 passenger decks, offering a variety of public venues. Deck 7, the Promenade, boasts dining and entertainment options, while Deck 14, the Lido Deck, focuses on poolside relaxation. Public areas include theaters, lounges, and wellness centers, ensuring a diverse cruise experience. The deck plan provides detailed layouts of pools, spas, and recreational activities, helping passengers navigate effortlessly.

Types of Cabins and Their Locations

The Grand Princess offers a variety of cabin categories, including interior, oceanview, and balcony staterooms, each strategically located across multiple decks. Suites and premium accommodations provide enhanced amenities for a luxurious stay. Accessible cabins are also available, ensuring comfort for all passengers. The deck plan PDF highlights the placement of each cabin type, helping travelers choose the perfect stateroom based on their preferences and needs.

Swimming Pools, Spas, and Entertainment Options

The Grand Princess features multiple swimming pools, including the Lido Deck pool for relaxation and the Splash Pool for family fun. The spa offers luxurious treatments, while entertainment options like Movies Under the Stars and The Sanctuary provide diverse leisure experiences. Deck plans highlight these amenities, ensuring passengers can easily locate their preferred spots for relaxation and enjoyment during their voyage.

Deck Highlights

Explore the Grand Princess’ standout decks, including Promenade Deck 7 for dining and entertainment, Lido Deck 14 for poolside relaxation, and Sports Deck 16 with recreational activities and The Sanctuary.

Promenade Deck (Deck 7) ⎯ Dining and Entertainment

Promenade Deck 7 is a vibrant hub offering exceptional dining and entertainment. Savor dishes at Alfredo’s Pizzeria, Salty Dog Grill, and Coffee & Cones. Enjoy live music, trivia, and comedy shows in the lounges. Stroll through duty-free shops or relax with a drink at the bar. This deck seamlessly blends relaxation and excitement, making it a focal point for onboard experiences.

Lido Deck (Deck 14) ⎯ Poolside Relaxation

Lido Deck 14 offers a tranquil retreat with its sparkling pools, whirlpool tubs, and sun-kissed loungers. Enjoy casual dining at Alfredo’s Pizzeria or grab a snack at the nearby eateries. Relax with a refreshing drink or take in the view of the horizon. The deck also features the popular Movies Under the Stars screen, perfect for evening entertainment under the sky.

Sports Deck (Deck 16) ⎯ Recreational Activities

The Sports Deck (Deck 16) is a hub for active cruisers, featuring a full sports court for basketball, tennis, and other games. Guests can also enjoy shuffleboard and a giant chess set for casual fun. The deck includes the Oasis Bar, offering refreshing drinks, and the Platinum Studio for entertainment. With its recreational offerings, Deck 16 provides a lively space for all ages to stay active and entertained at sea.

Public Venues and Amenities

Explore the Grand Princess’s public venues and amenities, offering a wide range of activities and services to enhance your cruise experience, including pools, spas, dining options, entertainment facilities, and wellness centers.

Dining Options ⎯ Restaurants and Bars

The Grand Princess offers diverse dining options, including Alfredo’s Pizzeria, Salty Dog Grill, and Coffee & Cones, added in 2019. Savor Italian cuisine at Sabatini’s, gourmet burgers at The Salty Dog, or premium steaks at Crown Grill. International buffets and specialty restaurants cater to all tastes. Bars like the Oasis Bar and Wheelhouse Bar provide refreshing cocktails, ensuring a vibrant dining and relaxation experience onboard.

Entertainment Facilities ⸺ Theaters and Lounges

Grand Princess features state-of-the-art entertainment venues, including the Princess Theater for Broadway-style shows and live performances. The Vista Lounge hosts comedy acts and musical entertainers, while the Wheelhouse Bar offers a cozy setting for live music and cocktails. Additional options like the Skywalkers Nightclub provide late-night dancing, ensuring diverse entertainment choices for all passengers throughout their journey.

Wellness and Fitness ⸺ Spa, Gym, and Wellness Center

Grand Princess offers a serene wellness experience at the Lotus Spa, featuring massages, facials, and other treatments. The fitness center is equipped with modern equipment and offers yoga, Pilates, and spinning classes. Additionally, the ship provides wellness programs, seminars, and a jogging track. The adults-only Sanctuary retreat and sports deck activities further enhance the wellness options, ensuring a rejuvenating experience for all passengers.

Cabin Categories and Locations

Grand Princess offers a variety of cabin categories, including interior, oceanview, and balcony staterooms, with locations spread across multiple decks to suit different preferences and budgets.

Interior, Oceanview, and Balcony Staterooms

Interior staterooms offer budget-friendly comfort, while oceanview rooms provide scenic vistas. Balcony staterooms feature private verandas for ultimate relaxation. Each category varies in size and amenities, with options to suit diverse traveler preferences. Deck locations range from lower levels to higher decks, offering different perspectives of the ocean. Perfect for solo travelers, couples, or families, these staterooms ensure a memorable voyage.

Suites and Premium Accommodations

Suites on the Grand Princess offer luxurious living with spacious balconies, separate living areas, and upscale amenities. Premium accommodations feature marble bathrooms, concierge services, and exclusive access to shipboard perks. Located on higher decks, these suites provide breathtaking ocean views and personalized service, ensuring a lavish and memorable cruise experience tailored to discerning travelers seeking elegance and comfort at sea.

Accessible Cabins and Special Features

Grand Princess offers accessible cabins designed for guests with mobility needs, featuring wider doorways, roll-in showers, and grab bars. These staterooms are strategically located on decks like Emerald and Dolphin for easy access to public areas. Select accessible cabins accommodate rollaways, with configurations to suit families or additional guests, ensuring a comfortable and inclusive cruise experience for all travelers.

Recent Renovations and Updates

Grand Princess underwent a 2019 renovation, introducing new top-deck dining venues like Alfredo’s Pizzeria and Salty Dog Grill, enhancing the passenger experience.

New Dining Venues Added in 2019 Renovation

The 2019 renovation introduced new dining options, including Alfredo’s Pizzeria, Salty Dog Grill, and Coffee & Cones. These venues offer fresh, handcrafted pizzas, gourmet burgers, and specialty coffee with ice cream, enhancing the ship’s culinary offerings and providing passengers with diverse dining experiences tailored to various tastes and preferences.

Enhanced Entertainment and Leisure Facilities

The 2019 renovation enhanced entertainment options with the addition of the Movies Under the Stars screen, offering poolside films. The Sanctuary, an adult-only retreat, provides a serene escape. These updates ensure passengers enjoy a mix of relaxation and entertainment, with modern amenities designed to cater to diverse preferences for a memorable cruise experience.

Special Features of the Grand Princess

Experience the unique charm of the Grand Princess with its iconic Movies Under the Stars screen and The Sanctuary, an exclusive adult-only retreat, perfect for relaxation and entertainment.

Movies Under the Stars Screen

The Grand Princess features an iconic Movies Under the Stars screen, offering outdoor cinema experiences under the night sky. Located on the upper decks, it provides a unique setting for movie nights, often accompanied by themed events and snacks. This popular venue is a highlight for many passengers, blending entertainment with the beauty of the ocean surroundings.

The Sanctuary ⎯ Adult-Only Retreat

The Sanctuary is a serene, adult-only retreat offering a peaceful escape from the ship’s lively atmosphere. Located on an upper deck, it features plush lounge chairs, shaded areas, and stunning ocean views. Guests can enjoy light bites, refreshing drinks, and attentive service in a tranquil setting, perfect for relaxation and privacy. It’s an ideal spot to unwind and recharge during your Grand Princess cruise.

Wedding Chapel and Event Spaces

The Grand Princess features a dedicated wedding chapel, perfect for intimate ceremonies at sea. The One5 wedding chapel offers elegant decor and stunning ocean views, creating a romantic setting for exchanging vows. Additional event spaces are available for receptions and gatherings, ensuring a memorable celebration. The ship’s event facilities cater to both small and large groups, providing a seamless experience for special occasions.

Planning Your Cruise with the Deck Plan

Utilize the Grand Princess deck plan PDF to explore ship layouts, plan activities, and choose the perfect cabin. Maximize your onboard experience with detailed insights.

How to Choose the Best Cabin Location

Selecting the ideal cabin on the Grand Princess involves considering factors like proximity to amenities, noise levels, and views. Cabins near elevators offer convenience, while those mid-ship minimize motion. Balcony staterooms provide ocean views, and suites offer luxury. Use the deck plan PDF to evaluate locations and choose a cabin that suits your preferences for a comfortable and enjoyable voyage.

Maximizing Your Onboard Experience

Plan ahead using the Grand Princess deck plan PDF to explore dining, entertainment, and wellness options. Book shore excursions early, indulge in poolside relaxation, and enjoy Movies Under the Stars. Take advantage of spa treatments, fitness classes, and vibrant nightlife. Stay connected with family and friends through the ship’s app. Make the most of your time aboard the Grand Princess for an unforgettable voyage.

Technical Specifications and Stats

Grand Princess measures 949 feet in length with a gross tonnage of 107,517, accommodating 2,600 guests. Inaugurated in 1998, it offers a space ratio of 34 gross tons per passenger, ensuring comfort and luxury at sea.

Guest Capacity, Length, and Gross Tonnage

Grand Princess accommodates 2,600 guests, with a total length of 949 feet and a gross tonnage of 107,517. Its size ensures ample space for amenities while maintaining passenger comfort. The ship’s dimensions and capacity make it an ideal choice for both relaxation and entertainment. This information is crucial for understanding the scale of the vessel and planning your cruise experience effectively.

Space Ratio and Passenger Comfort

Grand Princess offers a space ratio of 34 gross tons per passenger, ensuring ample room for comfort. With 13 publicly accessible decks and 8 cabin decks, the ship balances public areas and private quarters. Spacious cabins and well-distributed amenities enhance the cruising experience, providing a relaxed atmosphere for all guests, including those with accessibility needs, ensuring a stress-free and enjoyable journey at sea.

Downloading the Grand Princess Deck Plan PDF

Download the official Grand Princess deck plan PDF from Princess Cruises or trusted sources like CruiseMapper for detailed cabin layouts, amenities, and public venue locations to plan your cruise seamlessly.

Official Sources for the Latest Deck Plans

Access the most accurate and updated Grand Princess deck plans through Princess Cruises’ official website or trusted platforms like CruiseMapper. These sources provide detailed PDFs, ensuring you have the latest layouts, cabin locations, and public venue information to plan your cruise effectively. Always verify from official channels to avoid outdated or incorrect deck plan details.

Using the PDF for Cruise Preparation

The Grand Princess deck plan PDF is an essential tool for cruise preparation. It provides detailed layouts of all decks, highlighting cabin locations, dining venues, pools, entertainment options, and wellness facilities. Use it to familiarize yourself with the ship, plan activities, and book the best cabin for your needs. This guide ensures a seamless and enjoyable cruising experience, helping you make the most of your time onboard.

Contact Information for Further Assistance

For inquiries or assistance, contact Princess Cruises at 1-800-PRINCESS or visit their official website. Travel agents and customer service teams are available to help with deck plans and bookings;

Princess Cruises Customer Service

Princess Cruises offers dedicated customer support to assist with deck plan inquiries, bookings, and special requests. Call 1-800-PRINCESS or visit their official website for personalized help. Their team ensures seamless cruise planning, addressing questions about cabin locations, amenities, and accessibility. Whether you need details on staterooms or dining options, Princess Cruises’ customer service provides comprehensive support for a hassle-free experience.

Travel Agent Resources and Support

Travel agents can access comprehensive resources, including detailed deck plans and cabin layouts, to help clients plan their Grand Princess cruise. Princess Cruises provides dedicated support through their official website, offering downloadable PDFs and interactive tools. Agents can utilize these resources to assist with cabin selection, dining reservations, and activity planning, ensuring a personalized and seamless experience for their clients.

meet my brothers novel pdf free download

Written by Red Thirteen‚ Meet My Brothers follows Mia Bowen‚ who accidentally marries into a wealthy family. Discovering pregnancy‚ she faces a divorce agreement‚ exploring themes of family dynamics and resilience in a gripping romance.

Background and Plot Summary

Meet My Brothers‚ authored by Red Thirteen‚ delves into the life of Mia Bowen‚ a young woman who accidentally marries the heir of a wealthy family. The story unfolds as Mia navigates her unexpected marriage‚ pregnancy‚ and the subsequent challenges of family dynamics. On discovering her pregnancy‚ Mia is met with a divorce agreement‚ throwing her into a whirlwind of emotional turmoil and self-discovery. The novel explores themes of resilience‚ love‚ and the complexities of familial relationships‚ set against the backdrop of an affluent yet dysfunctional family. With 1‚886 chapters‚ the story intricately weaves romance‚ drama‚ and personal growth‚ making it a captivating read for fans of contemporary romance and family dramas.

Author and Genre Overview

Meet My Brothers is penned by the talented author Red Thirteen‚ known for crafting compelling narratives in the romance and drama genres. This novel falls under the categories of contemporary romance‚ family drama‚ and emotional fiction‚ appealing to readers who enjoy stories rich in character development and relational dynamics. Red Thirteen’s writing style is praised for its emotional depth‚ vivid storytelling‚ and ability to explore complex themes such as marriage‚ pregnancy‚ and self-discovery. The novel’s genre blends elements of romance‚ drama‚ and family-centric narratives‚ making it a favorite among fans of heartfelt and thought-provoking literature. With 1‚886 chapters‚ the book offers an extensive and immersive reading experience.

Key Themes in “Meet My Brothers”

The novel explores themes of family dynamics‚ marriage‚ pregnancy‚ and self-discovery‚ blending emotional resilience with the power of love‚ creating a deeply engaging and relatable story.

Family Dynamics and Relationships

In Meet My Brothers‚ family dynamics are central‚ exploring intricate relationships within a wealthy household. Mia’s marriage into an affluent family introduces her to a complex web of sibling rivalries and a disapproving mother-in-law. As she navigates these relationships‚ the novel delves into themes of loyalty‚ betrayal‚ and acceptance. The characters’ interactions reveal the challenges of fitting into a new family structure‚ highlighting the emotional strains and unexpected bonds that form. Through these dynamics‚ the story illustrates how family ties can both support and suffocate‚ offering a nuanced portrayal of love and conflict within a tight-knit yet dysfunctional family setting.

Marriage‚ Pregnancy‚ and Self-Discovery

Mia Bowen’s journey in Meet My Brothers is deeply intertwined with her unexpected marriage‚ pregnancy‚ and the ensuing quest for self-discovery. After accidentally marrying the heir of a wealthy family‚ Mia’s life is upended when she discovers she is pregnant‚ only to be handed divorce papers. This pivotal moment forces her to confront her identity‚ resilience‚ and future. The novel explores how these life-altering events shape her perspective‚ pushing her to redefine her sense of self. Through her struggles and growth‚ the story highlights the transformative power of adversity‚ offering a compelling exploration of love‚ loss‚ and personal evolution.

Availability of “Meet My Brothers” Novel

The novel is available for free PDF download or online reading through various platforms‚ with popular sites offering frequent chapter updates.

Free PDF Download Options

Readers can download the Meet My Brothers novel in PDF format for free through various online platforms. Websites like findnovel.net and AllNoveljr offer complete chapters‚ updated regularly. Additionally‚ platforms such as ReadNovelFull provide direct links for downloading the novel‚ ensuring easy access. The PDF version allows readers to enjoy the story offline‚ making it convenient for those who prefer reading on-the-go. With multiple sources available‚ fans of the novel can choose their preferred method to download and read Meet My Brothers without any cost. This accessibility has contributed to the novel’s growing popularity among readers worldwide.

Online Reading Platforms

Meet My Brothers is widely available for online reading across various platforms. Websites such as ReadNovelFull and AllNoveljr offer free access to the novel‚ with chapters updated regularly. Readers can enjoy the story directly in their browsers without needing to download a PDF; These platforms provide a seamless reading experience‚ allowing fans to follow Mia Bowen’s journey through marriage‚ pregnancy‚ and self-discovery. Online reading options are particularly convenient for those who prefer not to download files‚ ensuring easy access to the novel anytime‚ anywhere. This accessibility has made Meet My Brothers a favorite among readers seeking engaging romance and drama stories online.

Reading “Meet My Brothers” Online

Meet My Brothers is accessible on popular platforms like ReadNovelFull and AllNoveljr‚ offering free online reading. Chapters are regularly updated‚ allowing readers to follow Mia Bowen’s journey seamlessly. The novel’s engaging storyline and dynamic characters make it a favorite among romance and drama enthusiasts. Online access ensures convenience‚ enabling readers to enjoy the book anytime without downloading a PDF. This ease of access has contributed to its popularity‚ making it a must-read for fans of contemporary romance and family drama.

Popular Websites for Free Access

Several platforms offer free access to Meet My Brothers‚ including ReadNovelFull‚ AllNoveljr‚ and India’s Best Dancer. These websites provide complete chapters and regular updates‚ ensuring readers can follow Mia Bowen’s journey without interruption. Additionally‚ sites like nisfree.com and findnovel.net host the novel‚ catering to fans of romance and drama. These platforms are user-friendly‚ with easy navigation and no requirement for downloads. Readers can enjoy the story online‚ making it accessible to a global audience. The availability of free access has significantly contributed to the novel’s popularity‚ allowing readers to immerse themselves in its compelling narrative without cost.

Chapter Updates and Availability

Meet My Brothers is widely available‚ with chapters regularly updated on platforms like ReadNovelFull and AllNoveljr. Specific chapters‚ such as 41-50 and 51-60‚ can be downloaded as free PDFs or read online. The novel’s latest chapters‚ including Chapter 477‚ are accessible on these sites‚ ensuring fans stay engaged. Some platforms require creating a free account to access content‚ while others offer direct links. The frequent updates and easy accessibility make it convenient for readers to follow Mia Bowen’s journey. This availability has contributed to the novel’s popularity‚ allowing fans to enjoy its twists and turns without interruption. The free access ensures a broad audience can experience the story’s emotional depth and compelling narrative.

Reader Reviews and Feedback

Readers acclaim Meet My Brothers for its emotional depth‚ vivid characters‚ and engaging storyline‚ making it a top choice for fans of romance and drama‚ available free online.

General Reception and Ratings

Readers have widely praised Meet My Brothers for its emotional depth and compelling narrative. Many highlight its ability to weave intricate family dynamics with themes of resilience and love. The novel’s relatable characters and engaging plot have garnered high ratings‚ making it a favorite among romance and drama enthusiasts. Fans appreciate its vivid storytelling‚ which keeps them invested in Mia’s journey. The free availability of the novel online has further boosted its popularity‚ attracting a diverse audience. Overall‚ the positive feedback underscores its appeal as a must-read for those who enjoy heartfelt and thought-provoking stories.

Highlighted Comments from Readers

Readers have shared glowing feedback about Meet My Brothers‚ praising its emotional depth and relatable characters. One reader noted‚ “Mia’s journey is both heartbreaking and inspiring‚ making it impossible to put down.” Another commented‚ “The intricate family dynamics and unexpected twists kept me hooked from start to finish.” Many appreciate the novel’s ability to balance romance with real-life struggles‚ creating a story that resonates deeply. Others highlighted the free PDF availability‚ expressing gratitude for the accessibility of such a captivating read. Overall‚ the comments reflect a strong connection to the novel’s themes and characters‚ solidifying its place as a beloved story among readers.

Meet My Brothers captivates readers with its emotional journey‚ weaving family dynamics and personal growth into a compelling narrative. Its availability as a free PDF ensures accessibility for all.

Final Thoughts on the Novel

Meet My Brothers is a stirring tale of love‚ family‚ and resilience‚ crafted by Red Thirteen. The novel captivates with its intricate plot‚ delving into themes of marriage‚ pregnancy‚ and self-discovery. Mia Bowen’s journey‚ marked by unforeseen challenges and emotional depth‚ resonates deeply with readers. The story’s ability to weave drama and romance seamlessly ensures a compelling narrative. Its availability as a free PDF download has made it accessible to a wide audience‚ further enhancing its popularity. Readers praise its vivid characters and heartfelt storytelling‚ making it a standout in the romance genre. This novel is a must-read for those who enjoy emotional journeys and family dynamics.

Recommendations for Future Readers

Meet My Brothers is a must-read for fans of emotional journeys and family-centric stories. Its blend of romance‚ drama‚ and self-discovery makes it appealing to those who enjoy character-driven narratives. The novel’s exploration of complex relationships and real-life issues resonates deeply‚ offering a relatable and engaging experience. For readers seeking a story that balances heartache with hope‚ this book delivers. Its availability as a free PDF download adds to its accessibility‚ making it an excellent choice for anyone looking to immerse themselves in a captivating tale without cost. Dive into Mia’s world and discover the power of love and resilience in this unforgettable read.

mahalakshmi ashtakam pdf

The Mahalakshmi Ashtakam is a sacred hymn dedicated to Goddess Lakshmi, comprising eight verses that extol her divine attributes and blessings. Originating from the Padma Purana, it is chanted by Lord Indra to seek her grace. This prayer is a powerful invocation for wealth, prosperity, and spiritual growth, making it a popular choice among devotees. Its structured composition and profound meanings have made it a cherished text for those seeking divine blessings.

Overview of the Hymn

The Mahalakshmi Ashtakam is a devotional prayer dedicated to Goddess Lakshmi, consisting of eight verses that celebrate her divine attributes. It is a meditation on her role as the embodiment of wealth, prosperity, and spiritual enlightenment. The hymn, sourced from the Padma Purana, highlights her power to remove sins, grant desires, and bestow wisdom. Its verses are structured to evoke her blessings, making it a powerful tool for spiritual growth and material well-being. Chanting this hymn is believed to bring peace, prosperity, and divine grace.

Significance in Hindu Devotion

The Mahalakshmi Ashtakam holds profound significance in Hindu devotion as a powerful prayer to invoke Goddess Lakshmi’s blessings. It is chanted to seek prosperity, wealth, and spiritual enlightenment. Devotees believe that reciting this hymn with devotion removes sins, fulfills desires, and brings peace; It is often recited during auspicious occasions like Diwali and Lakshmi Puja, symbolizing the divine mother’s grace and protection. The hymn’s verses resonate deeply in Hindu spirituality, making it a cherished text for those seeking divine favor and harmony in life.

Structure and Composition

The Mahalakshmi Ashtakam is an eight-verse hymn dedicated to Goddess Lakshmi, each verse glorifying her distinct attributes. Composed in simple yet profound Sanskrit, it originates from the Padma Purana and was recited by Lord Indra. The hymn’s structure intricately weaves themes of sin removal, desire fulfillment, and the goddess’s eternal essence, making it a structurally elegant and spiritually rich composition cherished by devotees seeking divine grace.

Historical Background

The Mahalakshmi Ashtakam originates from the Padma Purana and is attributed to Lord Indra, who chanted it to appease Goddess Lakshmi. This ancient hymn, written in Sanskrit, has been a cornerstone of devotional practices for centuries, reflecting the deep reverence for Lakshmi in Hindu tradition. Its historical significance lies in its enduring use in rituals and ceremonies to invoke her blessings for prosperity and spiritual growth.

Origin of the Hymn

The Mahalakshmi Ashtakam originates from the sacred Padma Purana, an ancient Hindu scripture. This devotional hymn is attributed to Lord Indra, who composed it to praise Goddess Lakshmi and seek her divine grace. The hymn is structured as eight verses, each extolling a unique aspect of Mahalakshmi, making it a significant part of Hindu devotional practices. Its roots in ancient scripture and its enduring popularity underscore its spiritual and cultural importance.

Lord Indra’s Role in the Ashtakam

The Mahalakshmi Ashtakam is deeply associated with Lord Indra, who is said to have chanted it in devotion to Goddess Lakshmi. According to the Padma Purana, Indra composed this hymn to seek her divine grace and forgiveness. His devotion reflects the profound reverence for Mahalakshmi, emphasizing her role as the granter of prosperity and remover of obstacles. This sacred chant, attributed to Indra, underscores the hymn’s significance and its enduring appeal in Hindu worship.

Source from the Padma Purana

The Mahalakshmi Ashtakam is sourced from the revered Padma Purana, a prominent Hindu scripture. This sacred text narrates the hymn’s origin, describing how Lord Indra composed it to appease Goddess Lakshmi. The verses highlight her divine attributes, such as bestowing wealth and alleviating suffering, solidifying her role as a protector and provider. The Padma Purana adds spiritual weight to the Ashtakam, making it a cherished prayer for devotees seeking prosperity and divine grace.

Key Verses and Their Meanings

The Mahalakshmi Ashtakam comprises eight verses, each glorifying Goddess Lakshmi’s divine attributes. The verses describe her as the remover of sins, granter of success, and eternal supreme power, emphasizing her role as the universe’s protector and mother. Chanting these verses is believed to bring spiritual and material prosperity, fulfilling desires and alleviating suffering.

Verse 1: Salutations to Mahamaya

The first verse, “Namastestu mahamaye shree peete surapoojite,” is an invocation of Goddess Lakshmi as Mahamaya, the Great Enchantress. It describes her divine presence in Sri Pitha, her celestial abode, where she is worshipped by the Devas. This verse sets the tone for the hymn, expressing deep reverence and seeking her blessings. Reciting it is believed to connect devotees with her divine energy, bringing grace and prosperity into their lives. Its significance lies in its ability to evoke her benevolent presence.

Verse 2: The Remover of Sins and Sorrows

The second verse, “Namaste Garudaruhe,” portrays Goddess Lakshmi as a fierce protector and remover of sins. Mounted on Garuda, she is depicted as terrifying to demons and a savior for her devotees. This verse emphasizes her role in eradicating suffering and ignorance, offering solace to those seeking refuge. Chanting it is believed to purify the soul and alleviate mental and physical afflictions, reinforcing her compassionate and powerful nature. It’s a beacon of hope for those overwhelmed by adversity.

Verse 3: The Giver of Success and Intelligence

In the third verse, “Sarvagnye Sarvavarade,” Goddess Lakshmi is revered as the embodiment of omniscience and the granter of all boons. This verse highlights her role in bestowing success, intelligence, and wisdom upon her devotees. It underscores her ability to dispel ignorance and guide individuals toward their goals. Chanting this verse is believed to enhance mental clarity and grant the intellect needed to achieve success in both spiritual and worldly pursuits, making it a popular choice for students and professionals alike.

Verse 4: The Eternal and Supreme Power

The fourth verse, “Nitye Nityarthasakti”, praises Goddess Lakshmi as the eternal and supreme power, beyond the cycles of time. She is described as the ultimate reality, without beginning or end, and the mother of the universe. This verse emphasizes her role in sustaining creation and granting liberation. It also highlights her ability to destroy sins and sorrows, offering devotees spiritual and material prosperity. Chanting this verse is believed to connect one with her eternal essence, fostering a deeper understanding of her divine power. Her timeless presence is revered as the source of all existence and bliss, making her the supreme refuge for her devotees. This verse is particularly significant for those seeking enlightenment and eternal peace, as it encapsulates her role as the sustainer and protector of the cosmos, ensuring the well-being of all beings. By invoking her eternal power, devotees aim to transcend worldly limitations and attain spiritual harmony. The verse serves as a reminder of her unwavering presence in every aspect of life, guiding followers toward their ultimate goal of self-realization and union with the divine. The eternal and supreme power of Goddess Lakshmi is thus celebrated in this verse, reinforcing her status as the embodiment of cosmic energy and divine grace.

Verse 5: The Protector and Mother of the Universe

Verse 5 describes Mahalakshmi as the protector and mother of the universe, seated on a lotus throne. She embodies divine love and cosmic energy, nurturing all creation. This verse highlights her role in dispelling ignorance and protecting devotees from adversity. By chanting this verse, one seeks her maternal care and wisdom, fostering spiritual growth and worldly harmony. Her nurturing presence ensures the well-being of the universe, making her the ultimate protector and guide for her devotees. This verse is a heartfelt tribute to her boundless compassion and universal motherhood.

Verse 6: The Great Prosperity and Sin Remover

Verse 6 glorifies Mahalakshmi as the embodiment of boundless prosperity and the remover of sins. She is described as both gross and subtle, wielding immense power and prosperity. This verse emphasizes her ability to eliminate all karmic impurities and bestow wealth. Chanting this verse helps destroy sins, grants material abundance, and purifies the soul, ensuring a life filled with divine grace and eternal prosperity. Her blessings are sought to overcome adversity and attain spiritual and material wealth. This verse is a powerful invocation for purification and prosperity.

Verse 7: The Supreme Brahman and Universe Mother

Verse 7 extols Mahalakshmi as the Supreme Brahman and the Mother of the universe, seated on a lotus; She is revered as the ultimate reality, the great Lord, and the remover of all miseries. This verse underscores her divine omnipresence and her role in nurturing creation. Chanting this verse is believed to grant liberation and spiritual enlightenment, connecting devotees to her eternal essence. It embodies her cosmic significance and her benevolent grace in sustaining life and guiding souls toward divine union.

Verse 8: The White-Robed Devi

Verse 8 describes Mahalakshmi as the White-Robed Devi, seated on a lotus, embodying purity and divine light. She is celebrated as the remover of all sins and the eternal, timeless power. This verse emphasizes her cosmic essence, portraying her as the ultimate refuge and the mother of the universe. Chanting this verse is believed to purify the soul and bestow liberation, connecting devotees to her boundless compassion and divine grace. Her white robes symbolize her immaculate and transcendent nature.

Benefits of Chanting Mahalakshmi Ashtakam

Chanting Mahalakshmi Ashtakam brings spiritual and material prosperity, removes sins, and grants desires. It offers divine protection, fulfilling wishes and ensuring well-being, while fostering inner peace and harmony.

Spiritual and Material Prosperity

Chanting Mahalakshmi Ashtakam fosters spiritual growth and material abundance; It helps devotees attain peace, prosperity, and success in both worldly and divine realms. The hymn is believed to grant desires, ensuring wealth and happiness while fostering inner harmony and balance; Regular recitation strengthens one’s connection to Goddess Lakshmi, the embodiment of divine wealth and wisdom, leading to a fulfilling and prosperous life.

Removal of Sins and Suffering

The Mahalakshmi Ashtakam is revered for its power to absolve sins and alleviate suffering. By chanting this hymn with devotion, devotees seek forgiveness for past misdeeds and find solace from life’s challenges; It is believed that the divine grace of Goddess Lakshmi, invoked through these verses, purifies the soul and brings relief from emotional and mental distress, offering a path to spiritual cleansing and renewed peace of mind.

Granting of Desires and Wealth

The Mahalakshmi Ashtakam is a powerful hymn dedicated to Goddess Lakshmi, revered for its ability to grant desires and bestow wealth. By chanting these sacred verses with devotion, believers seek not only material prosperity but also the fulfillment of their heartfelt wishes. Originating from the Padma Purana and chanted by Lord Indra, this hymn is a cherished prayer among devotees, especially during auspicious occasions, as it is believed to invoke Goddess Lakshmi’s blessings for a prosperous and joyful life.

How to Download the PDF

The Mahalakshmi Ashtakam PDF is available on platforms like Google and spiritual websites. Search using keywords like “Mahalakshmi Ashtakam PDF” to find and download it for free or read online.

Available Platforms for Download

The Mahalakshmi Ashtakam PDF can be downloaded from various platforms including Google Books, Sanskrit libraries, and devotional websites. Many spiritual sites offer it for free download in multiple formats, such as PDF or text files. Additionally, platforms like Archive.org and Sanskrit.safire.com host the document for easy access. Devotees can also find it through Google Drive links shared by communities or temples, ensuring widespread availability for those seeking the hymn in digital form.

Steps to Access the PDF

To access the Mahalakshmi Ashtakam PDF, visit platforms like Google Books or Archive.org. Use keywords like “Mahalakshmi Ashtakam PDF” in the search bar. Filter results by file type to find PDFs. Click on the download link provided by reputable sources. Follow on-screen instructions to complete the download. Ensure the file is from trusted websites to avoid any security risks. This process is straightforward and quick, making the hymn easily accessible for devotees worldwide.

The Mahalakshmi Ashtakam is a divine hymn offering immense spiritual and material benefits. Chanting it regularly brings prosperity, peace, and divine grace. Embrace its power daily for a blessed life.

Final Thoughts on the Ashtakam’s Importance

The Mahalakshmi Ashtakam holds profound significance as a sacred hymn, offering spiritual and material prosperity. Its verses, rich in devotion, connect believers to Goddess Lakshmi, embodying her divine grace and power. Regular recitation fosters inner peace, wealth, and success, making it a timeless prayer for seekers of both spiritual growth and worldly blessings. Embrace its chanting to experience the transformative power of this ancient hymn in your life.

Encouragement for Daily Recitation

Embrace the habit of reciting the Mahalakshmi Ashtakam daily to invite divine blessings into your life. This sacred hymn, with its profound verses, fosters spiritual growth, prosperity, and inner peace. By chanting it regularly, you align yourself with Goddess Lakshmi’s grace, paving the way for wealth, success, and harmony. Make it a part of your daily routine to experience its transformative power and bask in the divine energy it embodies.

12-lead ecg placement pdf

The 12-lead ECG is a fundamental diagnostic tool for assessing cardiac electrical activity. Accurate electrode placement ensures precise recordings, enabling effective diagnosis of heart conditions and monitoring.

1.1 Overview of 12-Lead ECG

A 12-lead ECG is a comprehensive tool for assessing the heart’s electrical activity, providing a detailed view of cardiac function from multiple angles. It uses 10 electrodes placed on the body to generate 12 leads, offering insights into various cardiac conditions. This diagnostic method is widely used in both clinical and non-clinical settings to detect abnormalities such as ischemia, arrhythmias, and structural heart diseases. The 12-lead system is standardized, ensuring consistency in recordings and interpretations across different devices and settings. Its versatility allows it to be used in emergency situations, routine check-ups, and long-term monitoring, making it a cornerstone of cardiovascular care and diagnosis.

1.2 Importance of Accurate Electrode Placement

Accurate electrode placement is crucial for obtaining reliable 12-lead ECG readings. Misplacement can lead to inaccurate or misleading results, potentially causing incorrect diagnoses or delayed treatment. Proper positioning ensures that each lead captures the correct electrical signals from the heart, providing a clear and precise representation of cardiac activity. Consistent placement also allows for comparability between serial ECGs, aiding in the detection of subtle changes over time. Furthermore, accurate placement minimizes artifacts and interference, enhancing the quality of the recording. Adhering to standardized guidelines ensures that healthcare professionals can confidently interpret ECGs, making it a critical step in patient care and management.

Fundamentals of 12-Lead ECG Electrode Placement

The fundamentals of 12-lead ECG electrode placement involve standard locations for limb and chest leads. Consistent placement is key for accurate readings, avoiding bone and ensuring proper alignment, especially in female patients.

2.1 Standard Placement Locations for Limb Leads

The standard placement for limb leads involves positioning electrodes on the arms and legs. The RA (right arm) and LA (left arm) electrodes are placed on the distal ends of the wrists, while the RL (right leg) and LL (left leg) electrodes are positioned on the medial aspects of the ankles. It is crucial to avoid placing electrodes directly over bones or joints to minimize interference. For consistency, electrodes should be placed 1-2 cm away from the wrists and ankles. Proper placement ensures accurate recordings and avoids artifacts. Consistency across placements is vital for reliable ECG interpretations. Always refer to standardized guidelines for precise locations.

2.2 Proper Placement of Chest Leads

Proper placement of chest leads (V1-V6) is critical for capturing accurate anterior and lateral heart activity. V1 and V2 are placed at the fourth intercostal space, right and left of the sternum, respectively. V3 is midway between V2 and V4. V4 is at the fifth intercostal space, mid-clavicular line. V5 and V6 are placed horizontally aligned with V4, in the anterior axillary line. For female patients, chest leads should be placed under the breast tissue to avoid interference. Consistent placement ensures comparability of ECGs over time. Always use anatomical landmarks to guide placement and ensure electrodes are firmly attached to the skin for clear signals. Correct positioning minimizes artifacts and enhances diagnostic accuracy.

2.3 Key Anatomical Landmarks for Electrode Placement

Accurate electrode placement relies on identifying key anatomical landmarks. The manubrium of the sternum is the reference point for limb leads (RA, LA, RL, LL). Chest leads (V1-V6) are placed based on intercostal spaces and rib alignment. V1 and V2 are at the 4th intercostal space, right and left of the sternum. V4 is at the 5th intercostal space, mid-clavicular line. V3 is midway between V2 and V4, while V5 and V6 are placed anterior to the mid-axillary line. Proper alignment ensures electrodes avoid bony structures and breast tissue, optimizing signal clarity. Palpation of landmarks is essential for precise placement, ensuring reliable ECG recordings.

Step-by-Step Guide to 12-Lead ECG Placement

This guide provides a structured approach to placing electrodes for a 12-lead ECG, ensuring accuracy and patient comfort. Follow the sequence for optimal results.

3.1 Preparing the Patient and Equipment

Begin by explaining the procedure to the patient and ensuring they are comfortable. Position the patient in a supine position with arms at their sides. Remove jewelry and clothing that may interfere with electrode placement. Clean and dry the skin to ensure good electrode adhesion, using alcohol pads if necessary. Gather all necessary equipment, including electrodes, leads, and the ECG machine. Turn on the device and perform a quick calibration check. Ensure the environment is quiet and free from interference to minimize artifact. Proper preparation ensures accurate readings and a smooth process for both the patient and technician.

3.2 Placing Limb Electrodes (RA, LA, RL, LL)

Place the RA electrode on the right arm, 1-2 cm above the wrist, on the lateral (outer) aspect. The LA electrode goes on the left arm, mirroring the RA; For the lower limbs, position the RL electrode on the right leg, 1-2 cm above the ankle on the lateral aspect, and the LL electrode on the left leg, similarly placed. Ensure electrodes are not placed over joints or bony prominences. Secure them firmly to prevent movement and ensure good adhesion. This placement minimizes interference from muscle activity and ensures accurate recordings of the heart’s electrical activity;

3.3 Placing Chest Electrodes (V1-V6)

Begin by locating the fourth intercostal space at the midclavicular line for V1 and V2. Place V1 to the right of the sternum and V2 to the left. V3 is positioned midway between V2 and V4. V4 goes at the midclavicular line in the fifth intercostal space. V5 is placed in the anterior axillary line at the same level as V4, and V6 is further along the midaxillary line. Ensure electrodes are aligned horizontally and secured firmly, avoiding hair or muscle tissue for clear signals. Proper placement ensures accurate capture of the heart’s electrical activity from the chest leads.

Tips for Optimal ECG Readings

Ensure proper skin preparation, minimize interference, and secure electrodes firmly to avoid artifacts. Maintain a calm, still patient and use high-quality equipment for clear, accurate recordings.

4.1 Ensuring Proper Skin Preparation

Proper skin preparation is essential for obtaining high-quality ECG readings. Clean the skin thoroughly with alcohol to remove oils, lotions, or dirt, ensuring good electrode adhesion. Shave hairy areas if necessary to prevent interference. Avoid using excessive force, which may irritate the skin. Dry the area completely before placing electrodes, as moisture can cause artifacts. Ensure the skin is free from oils or residues, as this can impede electrode conductivity. Proper preparation minimizes noise and ensures accurate electrical signals are captured, leading to reliable ECG results. This step is critical for both initial and follow-up recordings to maintain consistency and comparability.

4.2 Minimizing Artifact Interference

Artifact interference can significantly distort ECG readings, leading to inaccurate interpretations. Common sources include muscle movement, electrical interference, and poor electrode adhesion. To minimize artifacts, ensure electrodes are securely placed on clean, dry skin and avoid areas with excessive hair or scar tissue. Use high-quality electrodes and maintain a quiet, stable environment during the recording. Patient movement should be discouraged, and electrical devices nearby should be turned off. Consistent electrode placement and proper skin preparation are also critical. Regularly inspect electrodes for loose connections, and ensure the ECG machine is calibrated correctly. By addressing these factors, you can reduce interference and obtain clearer, more reliable ECG tracings.

Troubleshooting Common Placement Errors

Identify misplaced electrodes by checking lead positioning and skin preparation. Correcting errors involves repositioning electrodes and ensuring proper adhesion to avoid signal distortions and inaccurate readings.

5.1 Identifying and Correcting Misplaced Electrodes

Accurate electrode placement is critical for clear ECG readings. Misplaced electrodes can lead to artifacts or inaccurate tracings. Common errors include incorrect limb lead placement, improper chest lead positioning, or failure to align electrodes with anatomical landmarks. To identify issues, inspect electrode positions and compare the ECG tracing to baseline norms. Correct misplaced electrodes by repositioning them according to standard guidelines, ensuring proper adhesion and skin contact. Pay special attention to chest leads, as small deviations can significantly affect readings. Verifying electrode placement before recording ensures reliable results and accurate cardiac assessments. Always refer to standardized protocols to maintain consistency and diagnostic accuracy;

5.2 Avoiding Errors in Chest Lead Placement

Accurate chest lead placement is vital for obtaining clear ECG readings. Errors often occur due to incorrect positioning or failure to align leads with anatomical landmarks. To avoid mistakes, ensure V1 and V2 are placed at the 4th intercostal space, near the sternum. V3 should be midway between V2 and V4, while V4 is at the 5th intercostal space, midclavicular line. V5 and V6 are placed horizontally aligned with V4, at the anterior axillary line. Use a stethoscope to locate the apical beat for precise V5 and V6 placement. Avoid placing leads over muscle or bone, as this can cause interference. Properly secure electrodes to prevent movement artifacts and ensure consistent, high-quality recordings. Regularly verify lead positions to maintain diagnostic accuracy and reliability.

Special Considerations

Accurate 12-lead ECG placement varies for female, pediatric, and geriatric patients. Adjustments ensure proper electrode positioning, avoiding interference from breast tissue in women and accommodating smaller body sizes in children and elders.

6.1 Electrode Placement in Female Patients

Proper 12-lead ECG electrode placement in female patients requires careful consideration to avoid interference from breast tissue. Chest leads (V1-V6) should be placed under the breast tissue when necessary, ensuring direct contact with the skin. Avoid placing electrodes on dense breast tissue to minimize artifacts. For limb leads, standard placements apply, but ensure electrodes are secure and comfortable. Skin preparation is crucial to enhance conductivity and reduce motion artifacts. Additionally, electrode adhesion should be checked to prevent displacement during movement. Accurate placement ensures reliable ECG readings, aiding in precise cardiac assessments for female patients.

6.2 Placement in Pediatric and Geriatric Patients

In pediatric patients, accurate 12-lead ECG placement requires adjusting for smaller body sizes. Limb electrodes should be proportionally placed, and chest leads (V1-V6) positioned according to the child’s anatomy. Geriatric patients may need electrodes placed carefully due to skin fragility or folds. Ensure electrodes adhere securely without causing discomfort. For both groups, skin preparation is vital to enhance conductivity. In pediatric cases, minimize movement to avoid artifacts. Geriatric patients may require additional time for electrode placement due to potential subcutaneous fat or bony prominences. Tailoring techniques to these populations ensures high-quality ECG recordings and accurate cardiac assessments.

Accurate 12-lead ECG placement is vital for reliable cardiac assessments. Proper electrode positioning and adherence to best practices ensure optimal recordings, aiding in precise diagnoses and effective patient care.

7.1 Summary of Best Practices

Accurate 12-lead ECG placement requires meticulous attention to detail. Ensure proper skin preparation by cleaning and drying the skin to enhance electrode adhesion and signal quality. Always use standardized electrode positions, avoiding bone and placing chest leads consistently. Minimize artifacts by ensuring the patient remains still, avoids talking, and keeps muscles relaxed during the recording. Verify electrode placement and connection before starting the ECG to prevent errors. Use high-quality electrodes and ensure proper equipment calibration. Consistency in lead placement across recordings is crucial for accurate comparisons. Always follow manufacturer guidelines for equipment use and maintenance. Proper documentation and verification of electrode placement are essential for reliable results.

7.2 Resources for Further Learning

For deeper understanding, explore comprehensive guides like the American Heart Association’s ECG Handbook or online courses from platforms like Coursera and Udemy. Websites such as ECGLibrary and Medical Training Institute offer detailed tutorials and diagrams. The British Journal of Cardiology publishes evidence-based articles on ECG interpretation. Additionally, video tutorials on YouTube channels like MedCram provide visual aids for electrode placement. Interactive tools, such as ECG simulators, allow hands-on practice. Always refer to peer-reviewed journals and reputable medical websites for updated practices. These resources help healthcare professionals refine their skills and stay current with advancements in 12-lead ECG placement and interpretation.

asco transfer switch manual

Welcome to the ASCO Transfer Switch Manual, your comprehensive guide to installing, operating, and maintaining ASCO transfer switches for reliable power management solutions.

Overview of ASCO Transfer Switches

ASCO transfer switches are designed to automatically or manually switch power sources, ensuring reliable backup power during outages. Available in various sizes, they support critical applications, from light industrial to large commercial systems. These switches are UL 1008 compliant, offering advanced features like load banking and remote monitoring. Built for durability, ASCO switches provide seamless power transitions, making them essential for mission-critical power management solutions.

Importance of the Manual for Installation and Operation

Importance of the Manual for Installation and Operation

This manual is essential for ensuring the proper installation, operation, and maintenance of ASCO transfer switches. It provides detailed instructions, safety precautions, and troubleshooting guidance to prevent hazards and ensure reliable performance. By following the manual, users can optimize switch functionality, comply with safety standards, and maintain system integrity. It serves as a critical reference for installers, operators, and maintenance personnel to achieve long-term efficiency and safety.

Key Features of ASCO Transfer Switches

ASCO transfer switches offer automatic and manual operation, load disconnect contacts, and remote control options. They are UL 1008 compliant, ensuring high reliability and safety for critical power systems.

Automatic and Manual Transfer Capabilities

ASCO transfer switches offer seamless automatic operation during power failures and manual control for maintenance or emergencies; Automatic mode ensures quick, reliable transitions between power sources, while manual mode allows operators to switch sources intentionally. The switch features clear position indicators (SOURCE 1, SOURCE 2, DISCONNECTED) for easy status verification, ensuring smooth transitions and minimizing downtime in critical power applications.

Load Disconnect and Engine Control Contacts

ASCO transfer switches feature load disconnect contacts for safely isolating the load during maintenance and engine control contacts for managing generator operation. These contacts enable smooth transitions, ensuring the generator starts or stops as needed. Load disconnect contacts prevent unexpected power flow, while engine control contacts handle signals for generator startup and shutdown, enhancing reliability and safety in power transfer applications.

Remote Control and Monitoring Options

ASCO transfer switches offer advanced remote control and monitoring capabilities, enabling real-time system oversight and efficient management of power transitions. Users can integrate these switches with critical power management systems for enhanced operational insight. Remote monitoring ensures timely alerts and diagnostics, while control features allow for seamless command execution. These options enhance reliability, simplify troubleshooting, and provide a centralized approach to managing backup power solutions effectively.

Installation and Setup

Proper installation of ASCO transfer switches ensures reliable operation. Mount the switch on a level surface, connect power conductors, and ensure all auxiliary circuits are securely linked. Always follow safety guidelines and manufacturer instructions for a seamless setup process.

Mounting the Transfer Switch

Mounting the ASCO transfer switch requires a level and stable surface. Ensure the enclosure is securely fastened to prevent vibration. Proper alignment with existing electrical systems is crucial for safe operation. Refer to the provided enclosure outline drawings for precise measurements. Always follow the manufacturer’s guidelines to ensure compliance with safety standards and optimal performance.

Connecting Power Conductors and Auxiliary Control Circuits

Connect power conductors to the ASCO transfer switch ensuring correct sizing and secure termination. Auxiliary control circuits, if required, must be properly wired according to the manual. Verify all connections comply with UL 1008 standards and manufacturer guidelines. Ensure the system is de-energized during wiring to prevent electrical hazards. Use torque specifications for terminal connections to guarantee reliable operation and safety.

Pre-Installation Checks and Safety Precautions

Before installing the ASCO transfer switch, ensure the site is prepared and all safety protocols are followed. Verify the rating label matches the application requirements and inspect for damage. De-energize all power sources and use proper personal protective equipment (PPE). Ensure the supporting foundation is level and secure. Follow all local electrical codes and manufacturer guidelines to avoid hazards and ensure compliance with safety standards.

Operation and Control

The ASCO transfer switch ensures seamless power management through automatic and manual modes, providing reliable control and quick transitions between power sources for uninterrupted operation.

Manual Operation Procedure

For manual operation, locate the external handle on the front left of the enclosure. Check the switch position indicators: SOURCE 1, SOURCE 2, or DISCONNECTED. To transfer loads, move the handle to the desired source. Ensure both power sources are disconnected before manual operation. Refer to the manual for detailed steps and safety precautions. Always verify the switch position before resuming operation to avoid power interruptions or system damage.

Automatic Transfer Switch (ATS) Modes

ASCO transfer switches operate in automatic or manual modes. In automatic mode, the ATS seamlessly switches between power sources based on detected faults. Manual mode allows operator intervention for maintenance or specific scenarios. Indicators like blinking lights signal transfer inhibit or active alarms. The controller monitors power conditions and executes transfers to ensure uninterrupted power supply, with features like load disconnect and engine control for enhanced reliability and safety during operation.

Remote and Local Control Features

ASCO transfer switches offer advanced remote and local control capabilities, ensuring seamless power management. Remote monitoring allows users to track system status and receive alerts, while local controls provide direct operation. Features like manual handles and status indicators enhance operational flexibility. These systems integrate with critical power management solutions, offering reliable and efficient control options for both emergency and routine operations, ensuring consistent power delivery and system reliability.

Troubleshooting Common Issues

Identify and isolate faults by checking installation, wiring, and system status. Refer to the ASCO manual for detailed solutions to common transfer switch operational issues.

Identifying and Isolating Faults

Begin by reviewing installation, wiring, and system status. Check for loose connections, incorrect configurations, or damaged components. Verify voltage levels and ensure proper grounding. Consult the ASCO manual for specific troubleshooting steps. Isolate faults by testing individual circuits or components. Use diagnostic tools to identify issues quickly. Always follow safety guidelines to prevent further damage or hazards during the troubleshooting process. Licensed electricians should handle advanced fault isolation and repairs. Ensure all safety protocols are observed to maintain system integrity and operator safety.

Common Causes of Transfer Failures

Transfer failures often result from improper installation, wiring errors, or damaged components. Faulty control circuits, incorrect voltage settings, or worn contacts can disrupt operation. Overloaded systems, poor maintenance, or environmental factors like humidity may also cause issues. Regular inspection and adherence to the ASCO manual’s guidelines can help prevent these failures. Always ensure proper grounding and compliance with UL standards to minimize risks and maintain reliable performance.

Resetting Alarms and Restoring Operation

To reset alarms and restore operation, press the RESET button on the controller after addressing the underlying issue. Ensure all power sources are stable before resetting. Refer to the manual for specific reset procedures, as steps may vary for Series 300 or 7000 models. Always verify the system’s readiness to avoid recurring issues.Consult the troubleshooting guide if alarms persist after reset attempts.

Maintenance and Upkeep

Regular maintenance ensures optimal performance and longevity of ASCO transfer switches. Inspect for wear, clean contacts, and replace parts as needed. Refer to the manual for specific schedules.

Scheduled Maintenance Tasks

Regular maintenance is crucial for ensuring the reliability and longevity of ASCO transfer switches. Schedule annual inspections of electrical connections, contacts, and operating mechanisms. Clean or replace contacts as needed to prevent wear and arcing. Lubricate moving parts per the manual’s recommendations; Additionally, test the transfer switch under load conditions annually to verify proper operation. Always refer to the ASCO manual for specific maintenance schedules and procedures.

Replacement of Wearable Parts

Replace wearable parts like contacts and Arcquip kits periodically to ensure optimal performance. Inspect and clean or replace contacts every 1-2 years or as needed. Lubricate hinge pins and moving parts annually. Always use genuine ASCO replacement parts to maintain reliability. Follow the manual’s procedures for proper part replacement and testing. Schedule replacements during planned maintenance to minimize downtime and ensure continuous power system reliability.

Testing and Verification Procedures

Perform thorough testing and verification after installation and maintenance. Conduct functional tests to ensure proper transfer operation, including insulation resistance and continuity checks. Verify timing settings for transfer and retransfer. Use a multimeter to confirm voltage and current ratings. Test all control circuits and remote monitoring features. Annual testing by a licensed electrician is recommended. Always refer to the manual for specific testing procedures to ensure safe and reliable operation of the transfer switch.

Safety Considerations

Always handle high-voltage components with caution. Wear appropriate PPE, including insulated gloves and safety glasses. Follow proper lockout/tagout procedures and adhere to emergency shutdown protocols to ensure safe operations.

High Voltage Warnings and Precautions

High voltage components in ASCO transfer switches can cause severe injury or death. Avoid touching live parts or components under voltage. Always de-energize the system before maintenance. Use insulated tools and wear appropriate PPE, including gloves and safety glasses. Ensure proper isolation and grounding procedures are followed. Never bypass safety interlocks or attempt unauthorized modifications. Use voltage testers to confirm de-energization before starting work. Adhere strictly to lockout/tagout procedures for safe servicing.

Proper Use of Personal Protective Equipment (PPE)

Always wear appropriate PPE when working with ASCO transfer switches to ensure safety. Use insulated gloves rated for the system voltage, safety glasses with a face shield, and arc-rated clothing for protection against electrical arcs. Ensure PPE meets industry standards like NFPA 70E. Avoid loose jewelry and use non-conductive tools. PPE should be inspected before use and replaced if damaged. Adhere to all safety guidelines to minimize risks during installation, maintenance, or operation.

Emergency Shutdown Procedures

In case of an emergency, immediately disconnect all power sources using the transfer switch’s disconnect feature. Ensure the system is de-energized before performing any maintenance. Activate the emergency stop button if available. Verify voltage absence with a calibrated meter. Switch the transfer switch to the manual position to prevent automatic reconnection. Isolate the system completely and follow all safety protocols to ensure a secure shutdown environment. Always refer to the manual for specific emergency procedures.

Technical Specifications

ASCO transfer switches feature load withstand ratings and fault circuit ratings as specified on the rating label. They comply with UL 1008 standards, ensuring reliability and safety across 30 to 400 amp sizes.

Rating Label and Load Withstand Ratings

The ASCO transfer switch rating label provides detailed specifications, including voltage, current, and fault withstand ratings. These ratings ensure the switch can handle maximum loads safely under various conditions. Compliance with UL 1008 standards guarantees reliability and performance. Always refer to the label for specific values to ensure proper installation and operation of your ASCO transfer switch for optimal power management.

Compliance with UL 1008 Standards

ASCO transfer switches are fully compliant with UL 1008 standards, ensuring reliable performance and safety in emergency power systems. These standards require rigorous testing for fault current withstand, operation, and endurance. Compliance guarantees the switch can safely transfer power between sources, meeting critical demands during outages. This certification reinforces ASCO’s commitment to quality and reliability in power management solutions for commercial and industrial applications.

Advanced Features

  • Load Banking: Allows testing of generators under full load conditions for optimal performance.
  • Quick Connects: Enables seamless integration of portable generators for temporary power solutions.
  • Critical Power Management: Enhances system reliability by integrating with advanced power management systems.

Load Banking and Quick Connects for Portable Generators

ASCO transfer switches offer advanced features like load banking, enabling generators to test under full load conditions for optimal performance. Quick connects simplify portable generator integration, providing temporary power solutions. These features ensure seamless backup power transitions, enhancing system reliability and flexibility. They are designed for commercial and light industrial use, supporting critical power needs effectively.

Integration with Critical Power Management Systems

ASCO transfer switches seamlessly integrate with critical power management systems, ensuring centralized control and monitoring of power distribution. This integration enhances system efficiency, enabling real-time data analysis and automated responses. It supports mission-critical applications, providing reliable backup solutions. The advanced features ensure optimal performance and compatibility with existing infrastructure, making them ideal for industries requiring uninterrupted power supply and robust power management capabilities.

This manual provides essential guidance for installing, operating, and maintaining ASCO transfer switches, ensuring reliable power management and compliance with safety standards for emergency systems.

Best Practices for Long-Term Reliability

Regular maintenance, including inspecting contacts and exercising the switch, ensures optimal performance. Always follow ASCO’s guidelines for scheduled maintenance tasks. Proper installation by a licensed electrician and adherence to safety protocols are critical. Test the switch periodically to verify functionality. Use personal protective equipment when working with high voltage. Keep emergency shutdown procedures readily accessible. These practices ensure your ASCO transfer switch provides dependable power management for years.

Final Checks and Operational Readiness

Before placing the ASCO transfer switch into service, ensure all connections are secure and settings are correctly configured. Test the switch under load to confirm proper operation. Verify that all indicators, alarms, and remote monitoring systems function as intended. Conduct a final inspection to ensure compliance with safety standards and operational readiness. Document the results and ensure all personnel are trained on emergency procedures and system operation.

15 minute resistance band workout pdf

Resistance band workouts offer a convenient, portable, and effective way to build strength and improve fitness in just 15 minutes․ Perfect for busy schedules and travel․

1․1 Overview of Resistance Bands

Resistance bands are lightweight, versatile tools offering varied resistance levels to target multiple muscle groups․ They are portable, easy to use, and suitable for all fitness levels․ Ideal for full-body workouts, bands provide consistent tension, enhancing strength and flexibility․ Their simplicity makes them perfect for quick, effective sessions, such as 15-minute routines, at home or while traveling․

1․2 Advantages of Short Duration Workouts

Short duration workouts, like 15-minute resistance band sessions, offer convenience, efficiency, and measurable results․ They boost metabolism, engage multiple muscle groups, and fit seamlessly into busy schedules․ These workouts are ideal for maintaining consistency, improving cardiovascular health, and enhancing strength without requiring significant time commitments, making them accessible for all fitness levels and lifestyles․

Benefits of 15-Minute Resistance Band Workouts

15-minute resistance band workouts offer time efficiency, portability, and cost-effectiveness, providing a full-body workout that suits all fitness levels and enhances strength and cardiovascular health․

2․1 Time Efficiency

A 15-minute resistance band workout is designed to maximize efficiency, fitting into tight schedules while delivering impactful results․ It targets multiple muscle groups simultaneously, boosting heart rate and improving cardiovascular health․ This concise format ensures quick, effective sessions, perfect for busy individuals seeking to maintain or enhance fitness without lengthy commitments, offering a balanced blend of strength and cardio benefits in minimal time․

2․2 Portability and Convenience

Resistance bands are lightweight and easy to carry, making them ideal for workouts on the go․ They require minimal space, allowing you to exercise anywhere, from a hotel room to an outdoor park․ This portability ensures you can maintain your fitness routine while traveling or when space is limited, offering unmatched convenience for busy lifestyles․

2․3 Cost-Effectiveness

Resistance bands are an affordable fitness option, offering a budget-friendly alternative to expensive gym equipment or memberships․ They are durable, long-lasting, and versatile, providing a variety of exercises for full-body workouts․ Their low cost and ability to be used anywhere make them a cost-effective solution for maintaining fitness without financial strain or commitment to gym fees․

Equipment Needed for the Workout

A high-quality resistance band, gloves for grip, and optional anchors or handles are essential․ These tools ensure safety, comfort, and versatility for effective 15-minute workouts anywhere․

3․1 Types of Resistance Bands

Resistance bands come in various styles, including loop, tube, and therapy bands․ Loop bands are versatile for full-body exercises, while tube bands offer handles for better grip․ Therapy bands are lightweight, ideal for rehab․ Figure-8 bands provide dual resistance for upper body workouts․ Choose based on durability, resistance levels, and portability to suit your fitness goals and workout space․

3․2 Essential Accessories

Elevate your workout with a high-quality exercise mat for comfort and hygiene․ A resistance band chart or guide ensures proper form and routine tracking․ A timer helps maintain the 15-minute structure, while safety handles or gloves prevent injuries․ These accessories enhance safety, convenience, and effectiveness, making your workout experience more enjoyable and productive․

Structure of the 15-Minute Workout

A 15-minute workout includes a dynamic warm-up, circuit training with resistance bands, and a cool-down stretch, ensuring efficiency and full-body engagement in minimal time․

4․1 Warm-Up Routine

A 5-minute warm-up routine is essential to prepare the body for exercise․ Dynamic stretches like arm circles, leg swings, and torso twists increase blood flow and flexibility․ Light resistance band movements, such as banded shoulder rotations and chest presses, activate the muscles without strain․ This routine ensures readiness for the workout ahead, reducing injury risk and improving performance․

4․2 Circuit Training Setup

Set up a circuit with 4-6 exercises, focusing on full-body engagement․ Perform each exercise for 30-50 seconds, followed by 10 seconds of rest․ Repeat the circuit 3-4 times, totaling 10-12 minutes of work․ This format maximizes efficiency, targeting multiple muscle groups while enhancing cardiovascular fitness․ It’s ideal for a 15-minute workout, ensuring a balanced and intense session․ Proper form and pacing are key to effectiveness․

4․3 Cool Down Stretching

Finish with static stretches for 3-5 minutes, focusing on major muscle groups․ Stretch hamstrings, quads, chest, and shoulders, holding each for 20-30 seconds․ Incorporate deep breathing to relax muscles and improve flexibility․ This cooldown helps prevent soreness and promotes recovery, ensuring your body is prepared for the next workout․ Move slowly and avoid bouncing to maintain safety and effectiveness․

Full-Body Exercises

Engage multiple muscle groups with dynamic movements like band squats, chest presses, and rows․ These exercises target the upper body, lower body, and core simultaneously for efficient workouts․

5․1 Upper Body Exercises

Effective upper body exercises include bicep curls, tricep dips, chest presses, and lateral raises․ These movements target the arms, shoulders, and chest, promoting muscle growth and strength․ Resistance bands provide consistent tension, ensuring a challenging workout․ Incorporate these exercises into your 15-minute routine to enhance upper body fitness efficiently and conveniently, perfect for both home and travel use․

5․2 Lower Body Exercises

Lower body exercises with resistance bands focus on strengthening the legs, glutes, and hips․ Squats, lunges, and leg presses are effective movements that target these muscle groups․ The bands provide resistance throughout the entire range of motion, enhancing muscle engagement․ These exercises are versatile, allowing for modifications to suit different fitness levels while delivering a comprehensive lower body workout in just minutes․

5․3 Core Strengthening Exercises

Core strengthening exercises with resistance bands target the abs, obliques, and lower back․ Planks, Russian twists, and overhead presses are effective movements that engage the core muscles․ These exercises improve stability, balance, and posture while being easy to incorporate into a short workout routine․ They offer a time-efficient way to build a stronger, more defined core in just minutes daily․

Tips for Maintaining Proper Form

Keep your core engaged, maintain proper alignment, and use smooth, controlled movements․ Avoid slouching or jerking the bands, ensuring even tension throughout exercises for maximum safety and effectiveness․

6․1 Common Mistakes to Avoid

Common mistakes include using the wrong resistance level, improper anchoring, and poor body positioning․ Avoid overstretching bands, as this can cause snapping․ Ensure proper form by keeping the core engaged and maintaining a full range of motion․ Jerky movements and neglecting to warm up can lead to injury․ Focus on controlled, smooth actions for safe and effective workouts․

6․2 Breathing Techniques

Proper breathing is essential for maximizing workout effectiveness and preventing injury․ Inhale during the relaxation phase and exhale during the resistance phase to maintain rhythm․ Avoid holding your breath, as this can lead to dizziness or muscle tension․ Consistent, controlled breathing enhances stamina and ensures safe, effective exercises throughout your 15-minute resistance band workout routine․

Modifications for Different Fitness Levels

Resistance band workouts can be modified to suit different fitness levels․ Beginners can use lighter bands, while advanced users can increase reps or intensity․ Proper technique ensures safety and effectiveness for all․

7․1 Beginner Adjustments

Beginners can modify resistance band workouts by using lighter bands or reducing reps․ Start with bodyweight exercises and gradually add resistance․ Focus on proper technique to avoid injury․ Short breaks between sets and lower intensity can help build a strong foundation․ This approach ensures safety and progress, making the workout accessible for those new to resistance training․

7․2 Advanced Variations

For advanced users, increase intensity by using heavier bands, extending range of motion, or adding complex movements․ Incorporate dynamic exercises like band rotations or explosive reps․ Reduce rest periods between sets and combine compound movements for a full-body challenge․ These variations enhance strength, endurance, and muscle engagement, catering to those seeking a more rigorous workout․

Tracking Progress and Staying Motivated

Track progress by logging workouts and measuring improvements․ Stay motivated by setting achievable goals and celebrating small victories, ensuring consistency and long-term commitment to fitness․

8․1 Setting Realistic Goals

Set specific, achievable goals for your 15-minute resistance band workouts, such as increasing reps or resistance over time․ Start with manageable targets, track progress, and celebrate milestones to stay motivated and committed to your fitness journey․

8․2 Using a Workout Journal

Maintain consistency and motivation by documenting your 15-minute resistance band workouts in a journal․ Record exercises, resistance levels, and reps to track progress․ Reflect on your routine regularly to identify improvements and stay accountable; Celebrate milestones and adjust goals as you evolve, ensuring continuous growth and engagement in your fitness journey․

Safety Precautions

Inspect resistance bands for wear and tear before use․ Avoid using damaged bands to prevent snaps․ Ensure the workout area is clear of obstacles to minimize injury risks․

9․1 Proper Handling of Bands

Inspect resistance bands for frays or cracks before use․ Anchor bands securely to prevent slipping․ Store bands away from direct sunlight and extreme temperatures to maintain elasticity and durability․

9․2 Injury Prevention Tips

Always warm up before starting․ Wear proper attire and ensure bands are secure․ Start with lighter resistance to avoid strain․ Avoid snapping bands near the face․ Check for damaged bands beforehand․ Focus on controlled movements and proper form․ Stop if pain occurs and rest as needed․ Listen to your body to prevent overexertion․

Resistance band workouts are a convenient and effective way to transform your body in just 15 minutes․ For more detailed routines, check out the 15 Minute Resistance Band Workout PDF guide․

10․1 Summarizing the Workout

A 15-minute resistance band workout is a time-efficient, full-body routine that combines strength training and cardio․ It engages multiple muscle groups, improves flexibility, and boosts metabolism․ The workout is ideal for home or travel, requiring minimal equipment․ Focus on proper form, adjustable resistance levels, and consistent effort to maximize results․ Perfect for busy individuals seeking a quick, effective fitness routine․

10․2 Recommended Reading and Guides

For further guidance, download the 15 Minute Resistance Band Workout PDF, which offers detailed routines and visual aids․ Explore expert tips on progression, form, and variations․ Additional resources include workout journals, fitness apps, and motivational blogs․ These guides cater to all fitness levels, ensuring a safe and effective workout experience with resistance bands․

« Older posts Newer posts »